We all know that if you want to hire the best freelance workers, you have to prepare for a difficult, tiresome, and time-consuming process. But it doesn’t have to be like that!
Freesoto is an amazing tool created to make your life easier! With the help of Freesoto, you can create new projects, organize freelancers, provide them with a detailed project brief, interview and rate them, and, finally, choose the ones that are the best. And all that in just a few clicks.
Take a look at how Freesoto works and how easy it is to use it.
How to make a Freesoto account?
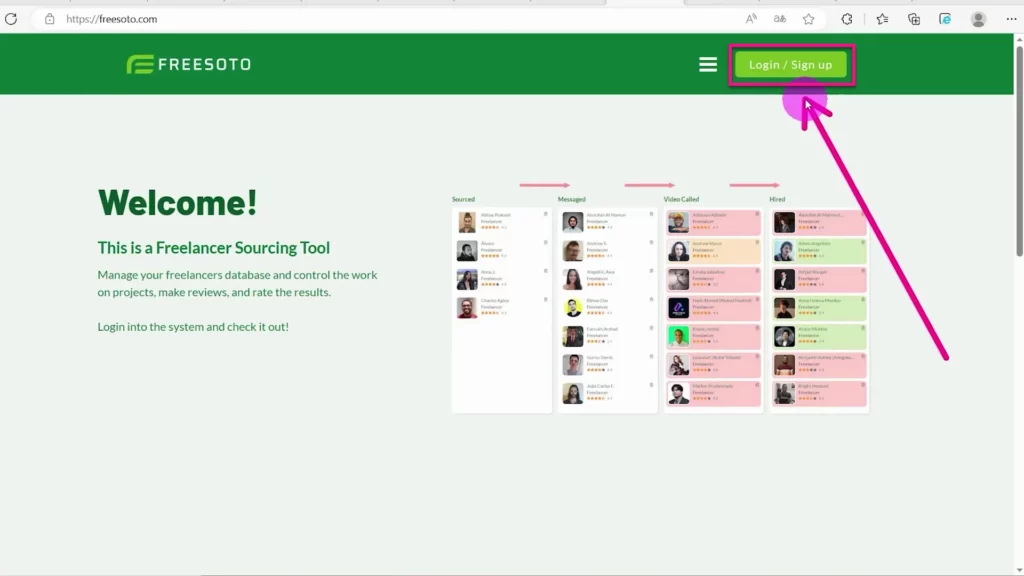
Making a Freesoto account is very simple. When you open the application, in the top right corner of our Welcome page, you will see a Login / Sign up button. Click that button.
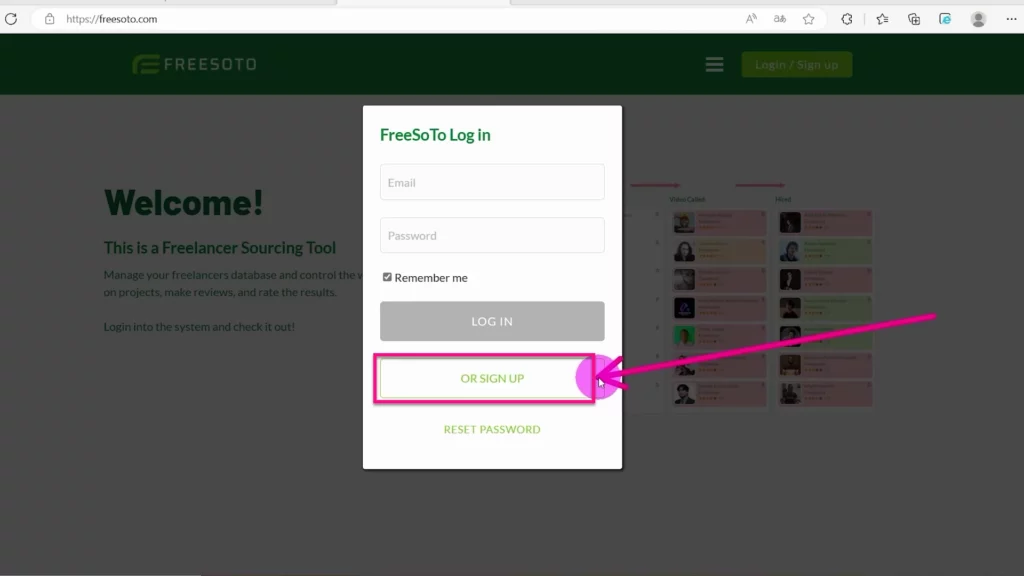
A new window will open. Since you are not registered yet, click on Or sign-up button.
After you click on the Sign-up button, you will see a new Sign-up window. Enter your email address. Then, choose your password and confirm it.
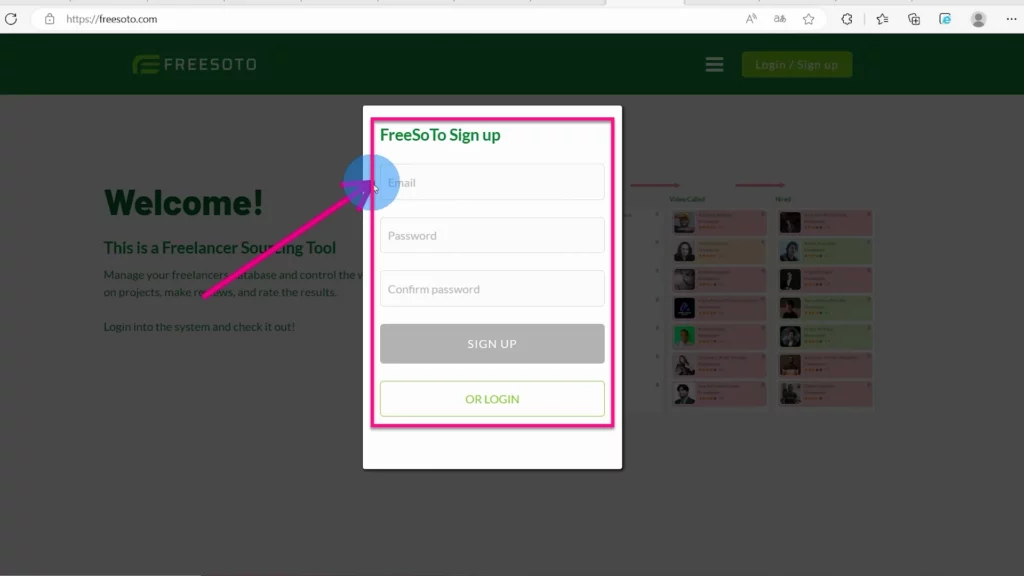
Now, click on the Or sign-up button and you are good to go! You are now a registered user of the Freesoto application. Welcome!
How to create a new project easily?
Once you are logged in, you will see a Freesoto dashboard. Currently, there are no freelancers or projects here. In the top navigation bar, you can see several, easy-to-use features for creating projects and adding freelancers. Let’s see how they work!
If you want to create a project, click on the Plus button in the top navigation bar and a dropdown menu will appear. From the dropdown menu, select New Project.
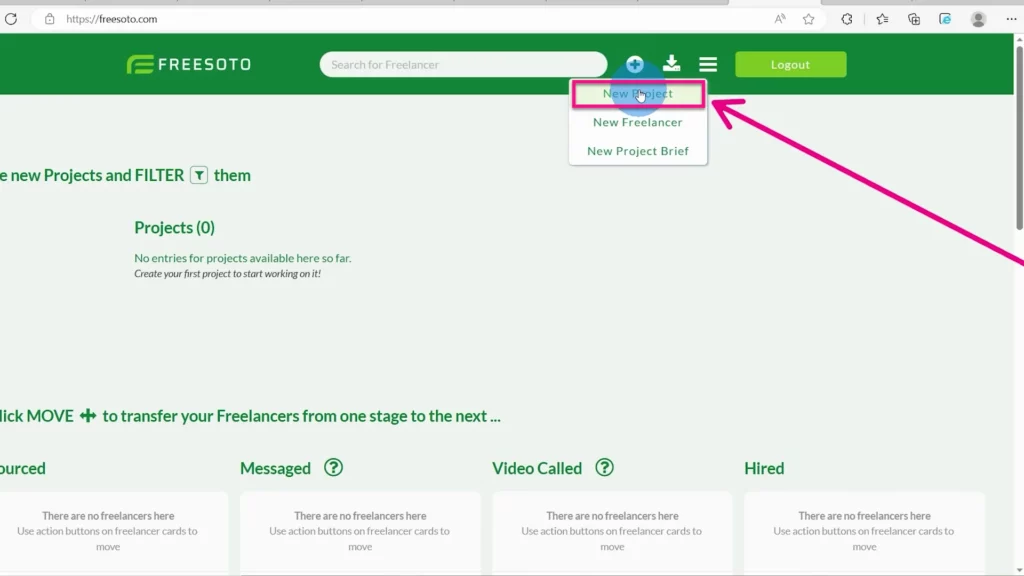
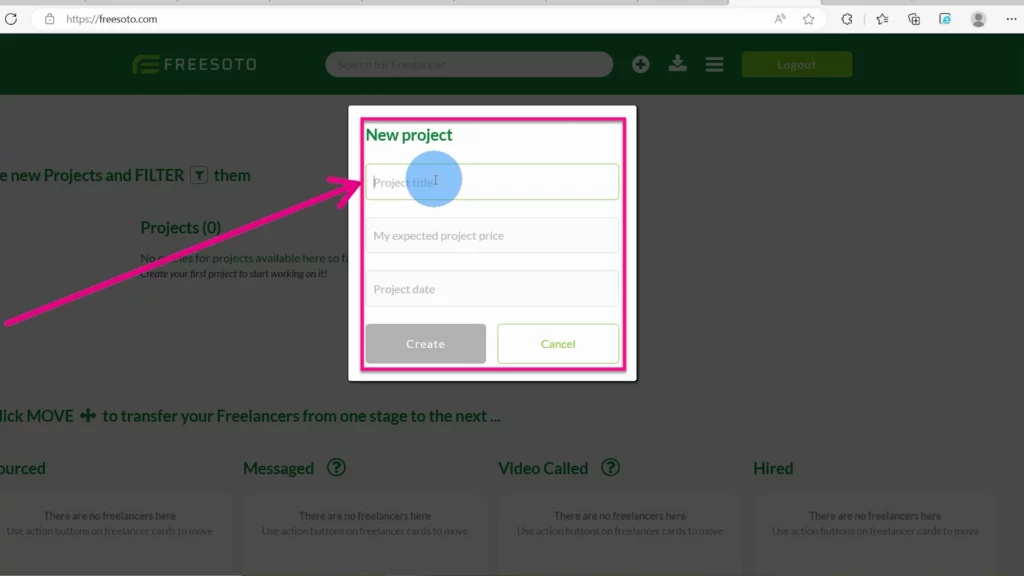
A small window will appear where you can add the project’s most relevant information. First of all, add the project title. Try to be specific to easily differentiate this project from your other projects since Freesoto allows you to manage multiple projects.
After naming your project, enter your estimated project budget and the project date. Next, click on the Create button to create a new project.
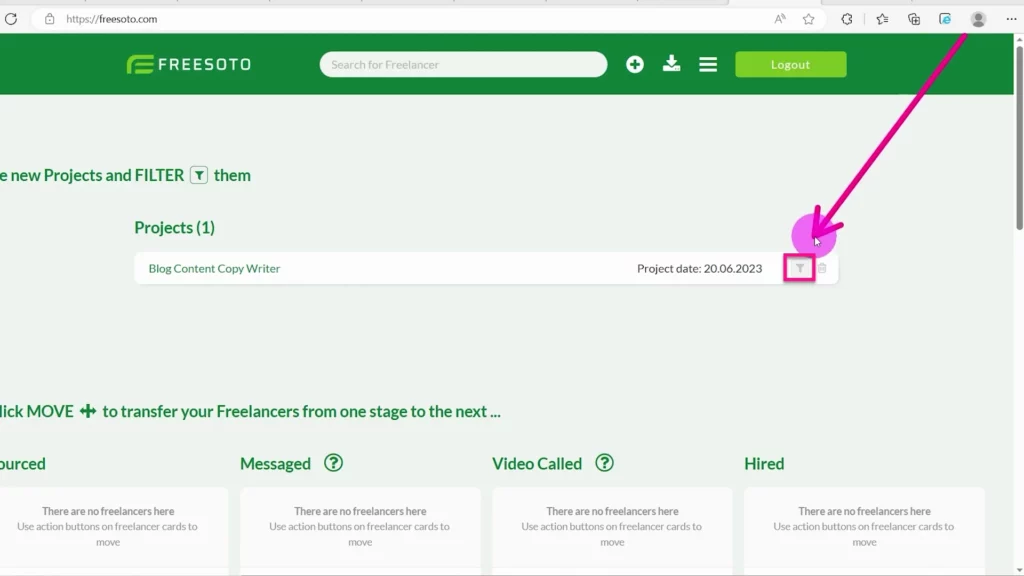
If you have multiple projects, you can click on the filter icon. The filter icon enables you to only see freelancers assigned to that specific project.
How to add freelancers and create freelancer cards?
Again, click on the plus sign (+) at the top of the navigation bar and a drop-down menu will appear. This time, select New Freelancer.
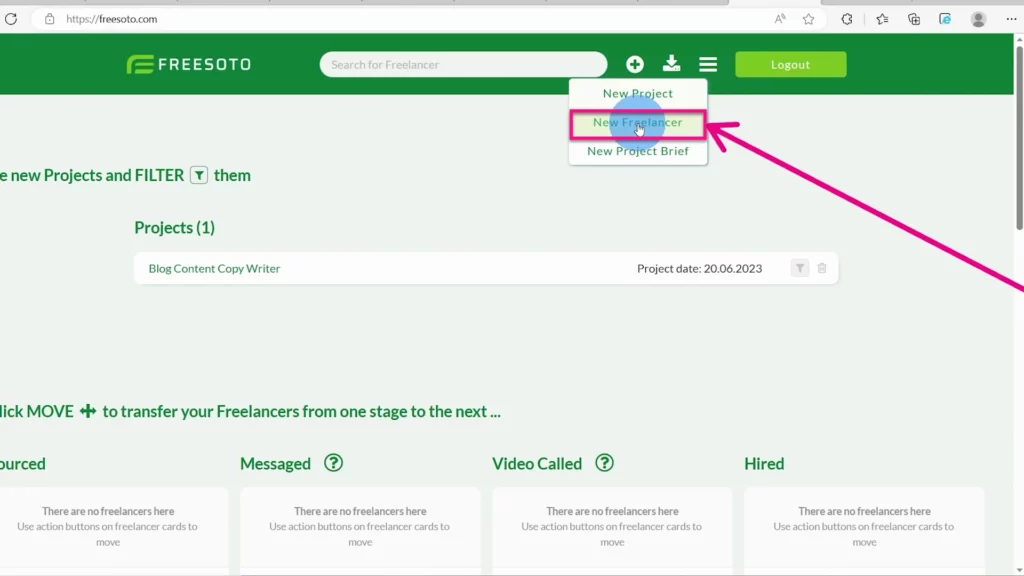
You will see a small Add Freelancer window. Type in the freelancer’s name. Add the platform where you found them, whether it is Upwork, Fiverr, or any other, and assign them to one of your projects. You can also add their image if you have one.
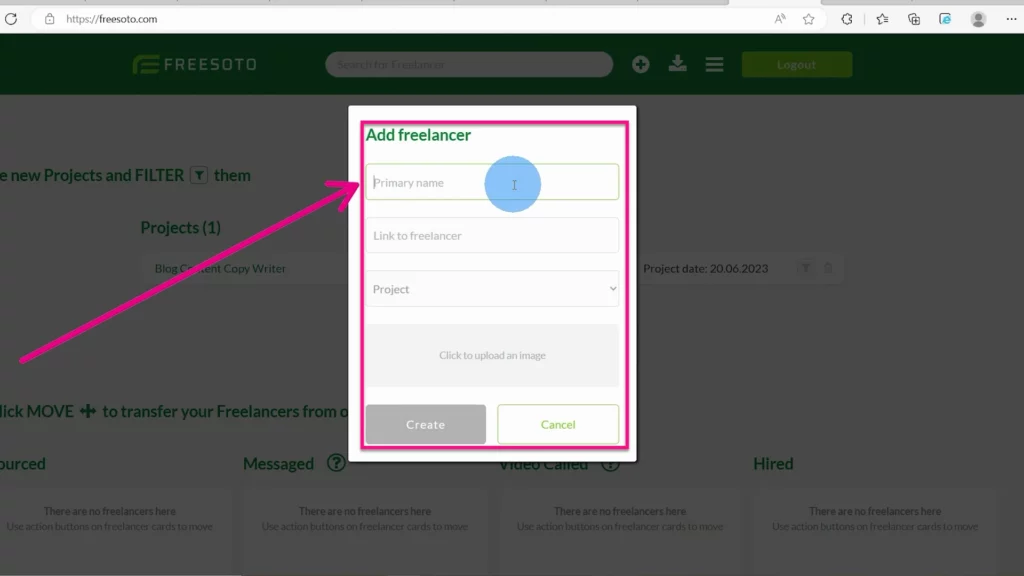
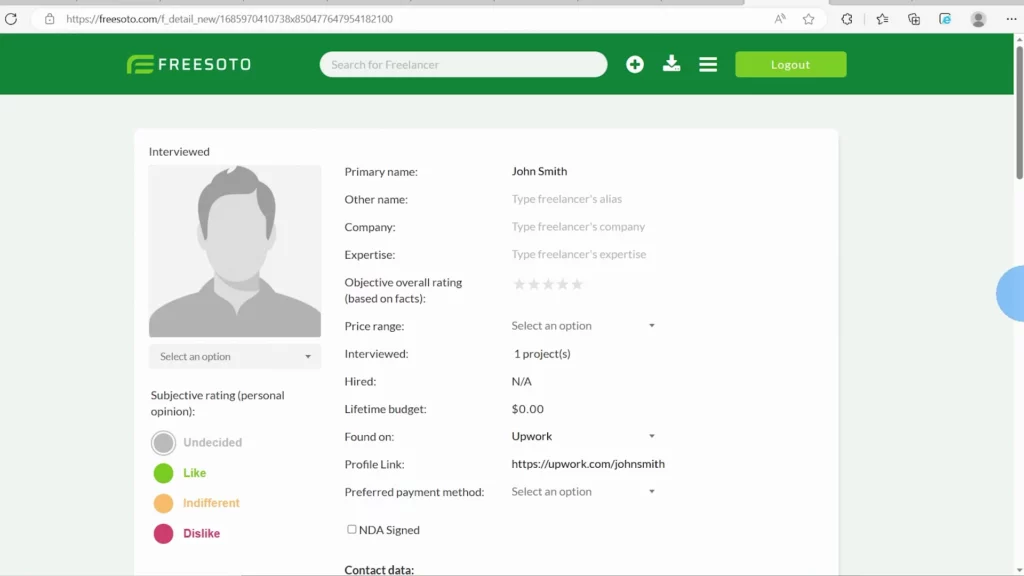
Next, click on the Create button. You have now created a new freelancer card. Now you have all the important information about that freelancer in one place.
How to speed up the process with the Project Brief Creator?
Of course, you can create multiple freelancer cards for all of your potential workers. However, creating a freelancer card for each of your freelancers separately can be a lot of work. That’s where our great feature — Project Brief Creator — comes in. Let’s see how it works.
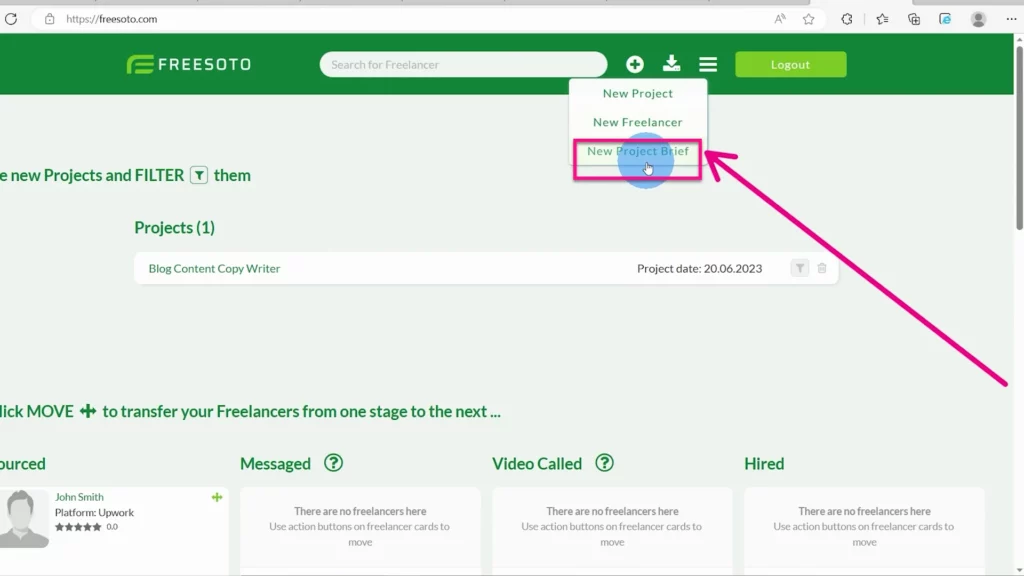
Click on the plus sign (+) at the top navigation bar from the drop-down menu and select New Project Brief.
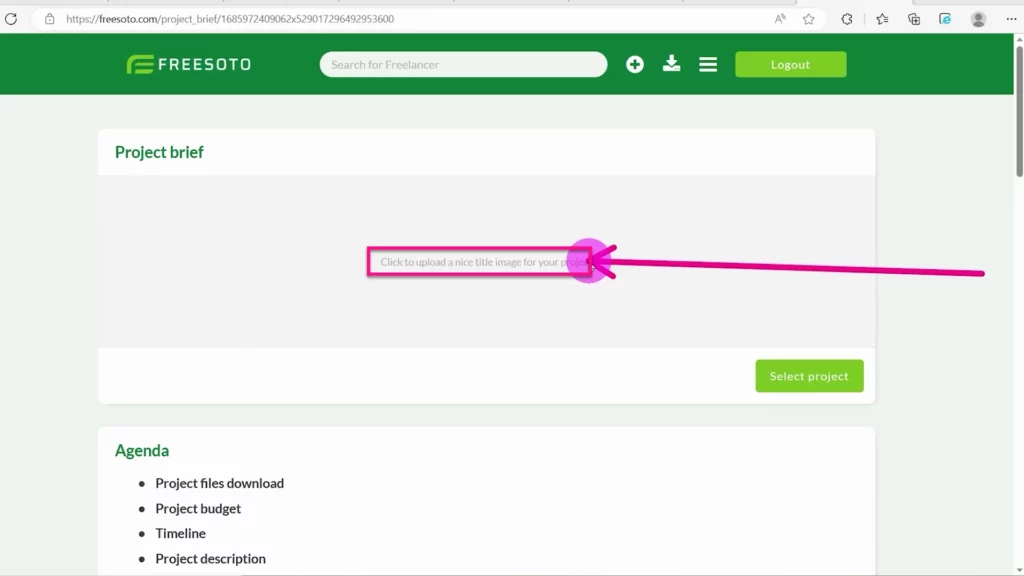
That will open the project brief page. There is a space where you can click and upload a nice title image for your project. This will make your project page look more organized and appealing.
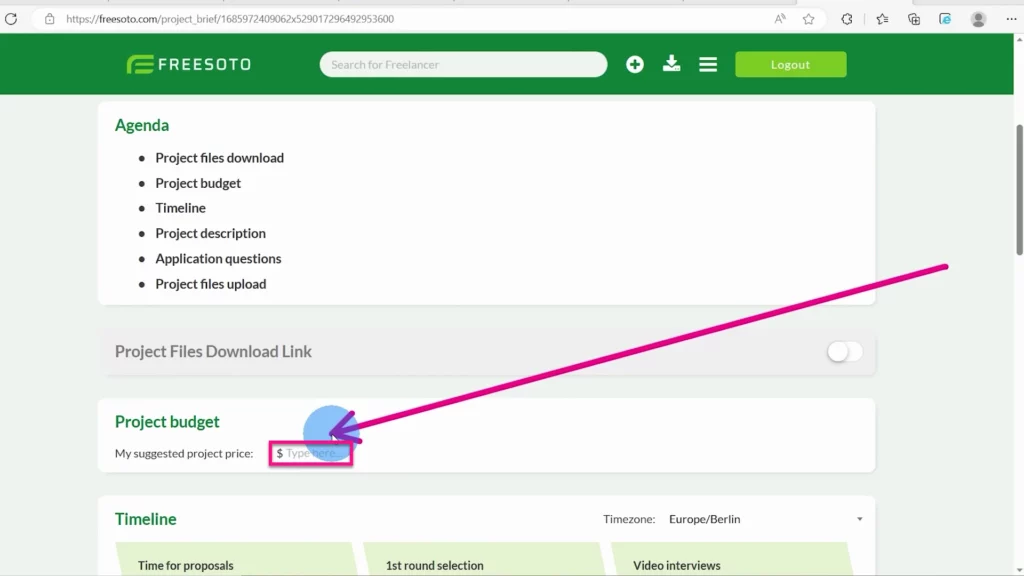
On the same page, you can add an estimated project budget or suggested project price. This will inform your potential workers how much you are willing to spend on that project.
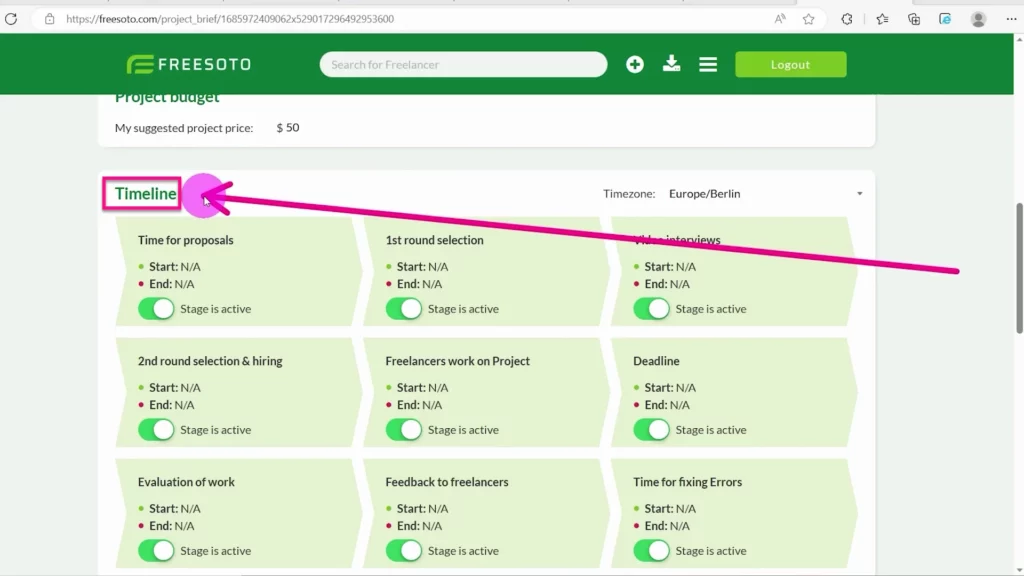
Freesoto allows you to set a nice and clear, easy-to-follow timeline. This feature enables you to structure your project and inform freelancers about the different stages of the hiring process. You can determine the start and the end of each stage and underline the expected deadlines.
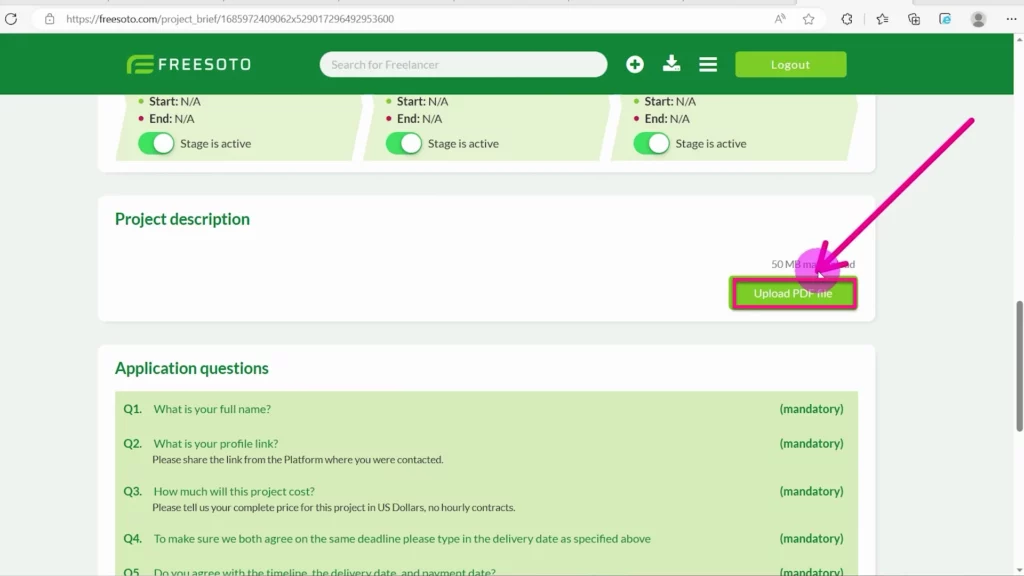
Below the timeline, there is an Upload a PDF file button. How does it work?
Create a detailed description of the task for freelancers. You can use Google Slides or any other application. Make the description clear, concise, and accurate. Save it as a PDF file and upload it to Freesoto by clicking on the Upload PDF button.
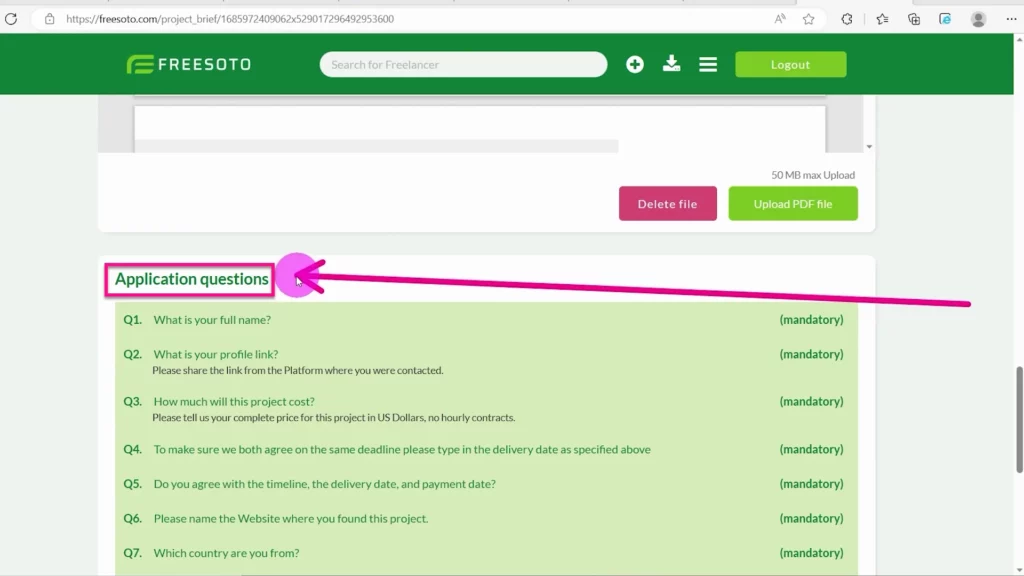
How to create application questions for freelancers?
Project Brief Creator also contains Application Questions. When freelancers read the Project Brief, they will have to answer these questions. The top part is mandatory, while the bottom is optional. You can always add more questions.
These questions will identify freelancers that haven’t read the brief so you can easily spot and remove them. The answers the freelancers provide will become a part of their freelancer cards.
Below the Application Questions, you can see the Project Files Upload Link. Freesoto will generate a unique link for your project brief, which you can then share on all freelance platforms.
When freelancers click on that link, they will be able to see your Project Brief along with Application Questions and answer them.

Moving freelancer cards from Sourced to other columns
Let’s go back to the dashboard. All the freelancers that apply through your Project Brief will be listed in the Sourced column. In the upper right corner of the Sourced column, you can see a small Move button. This button allows you to move freelancer cards from Sourced to other columns.
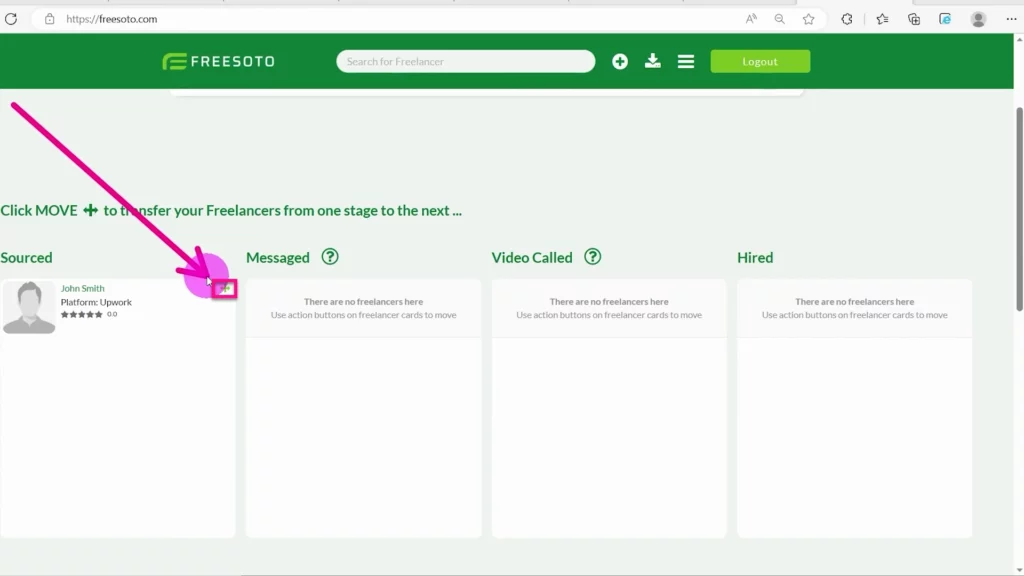
When you click the Move button, a drop-down menu appears, and you can choose the column you want the freelancer card to be moved to. Once you start messaging a freelancer and engaging in a conversation with them, you can move their freelancer card to the Messaged column.
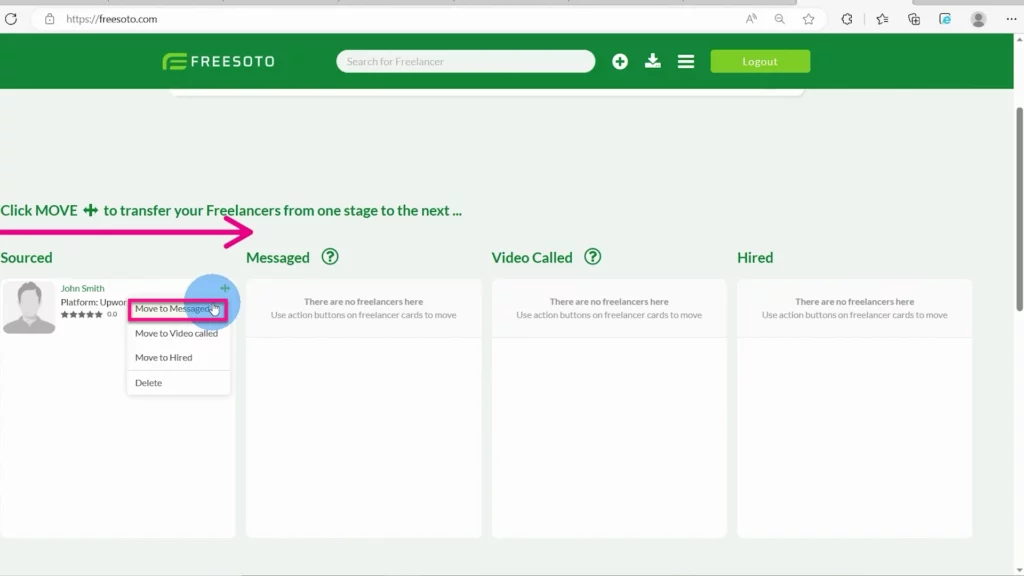
If you video-call a freelancer, move their freelance card to the Video-called column. This provides a nice, clear insight into the whole process and follows the progress of each freelancer throughout that process.
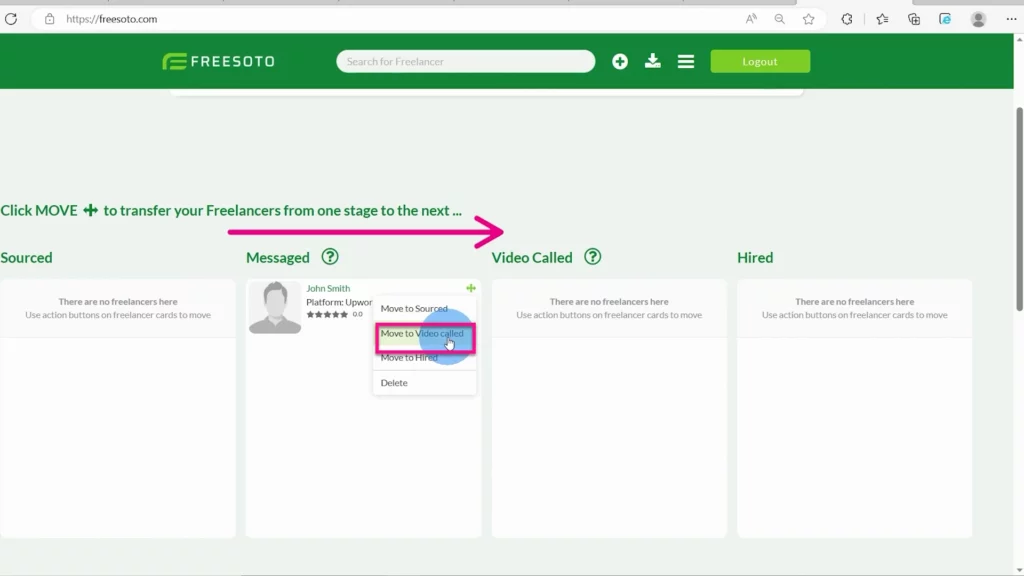
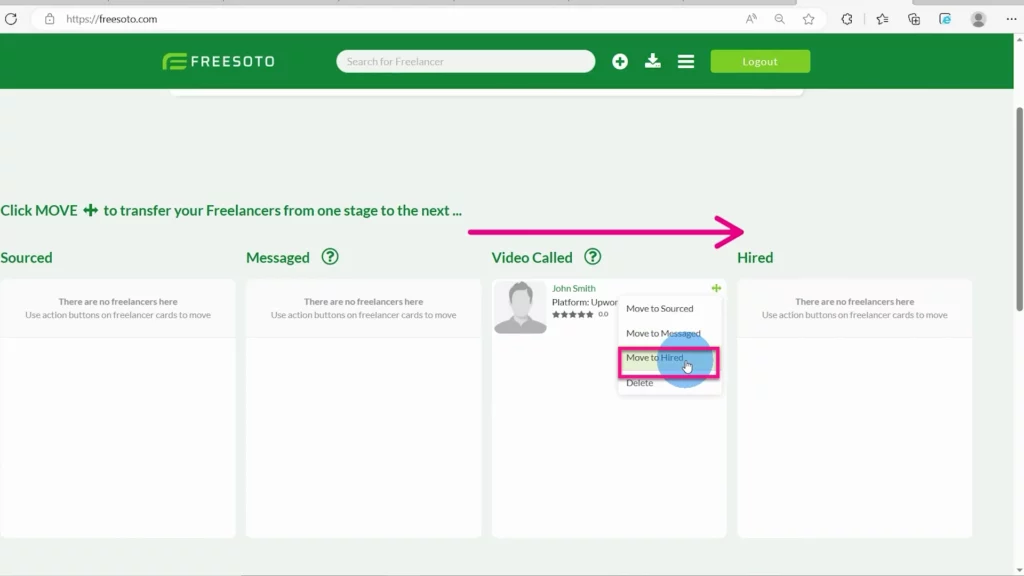
As you move forward, the number of freelancers decreases. When you finally decide which freelancer you want to hire, move their freelancer card to the Hired column.
How does the rating process work?
One of the most important things in the hiring process is rating your candidates. You need to consider many different aspects before you decide who is the best fit for your project.
If you click on any freelancer card, you open up the freelancer’s detail page. Here you can see their status — whether they are interviewed or hired. This is also the place where you can rate them.
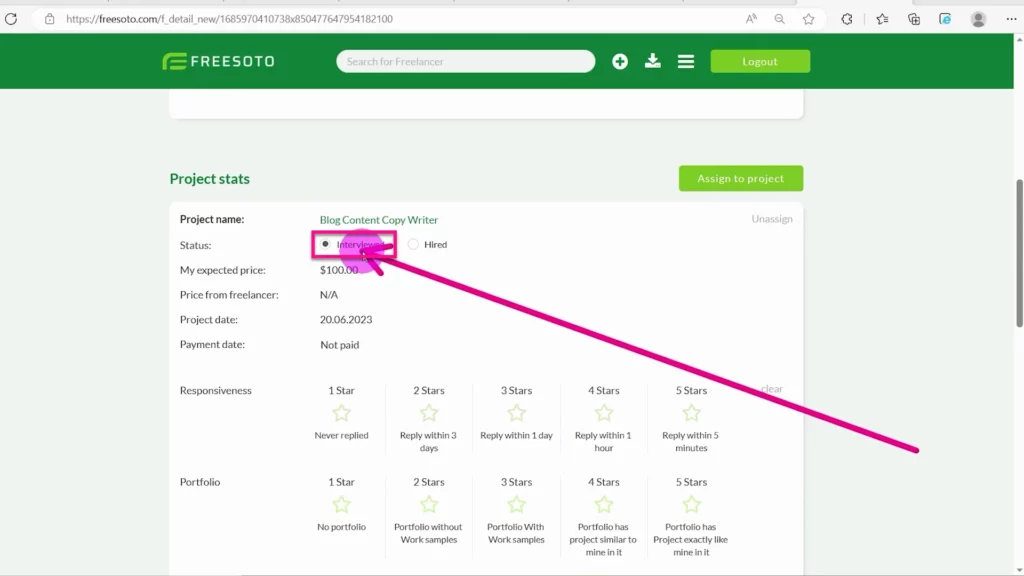
If their status is set to Interviewed, you can rate their responsiveness, portfolio, proposal, and English proficiency. You can rate them from 1 to 5 stars. Every rating has a precise explanation, as its goal is to be as accurate and objective as possible.

Once your freelancers are hired, you can switch their status to Hired and rate your experience working with them.
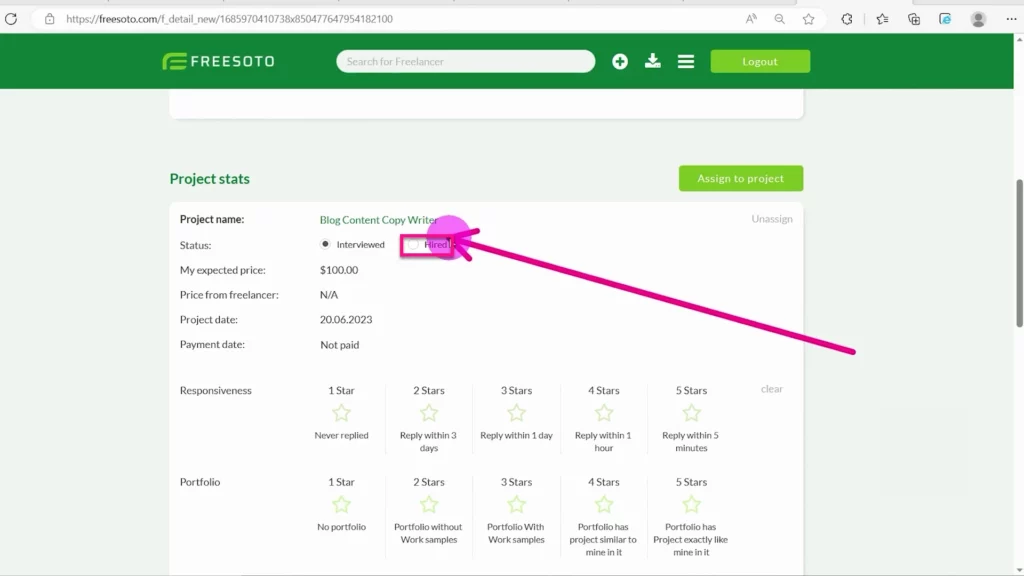
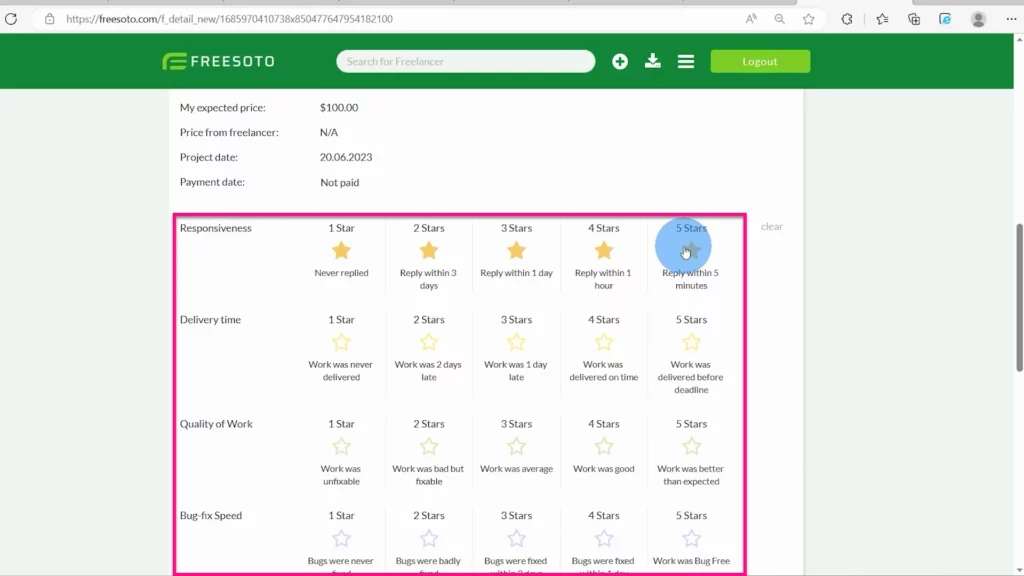
Again, you can rate them with 1 to 5 stars and express your satisfaction with their responsiveness, delivery time, quality of work, and bug-fix speed.
Freesoto will then calculate the average rating based on all other ratings and display it on the freelancer’s detail page under Objective Overall Rating.
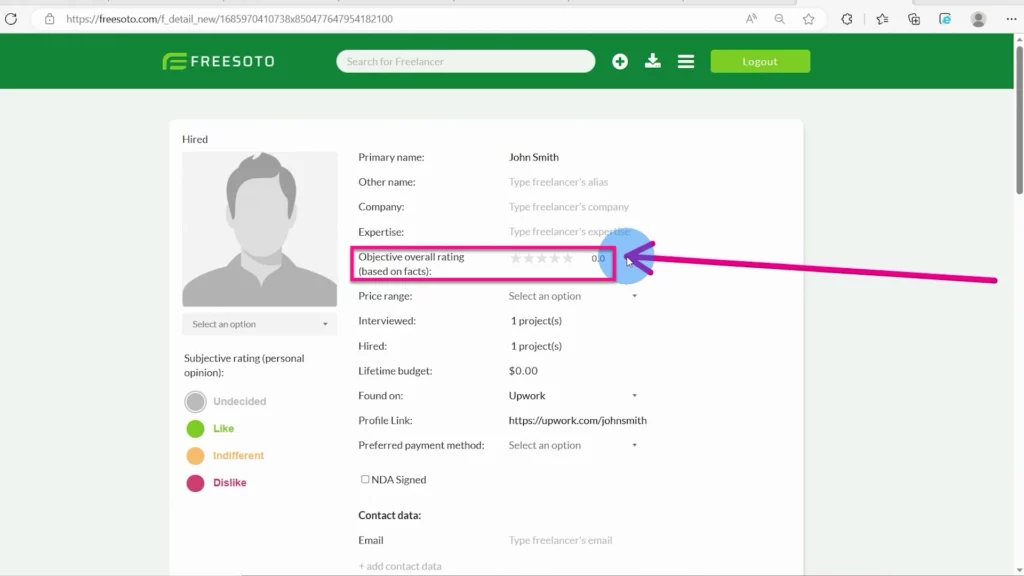
Objective vs. Subjective rating
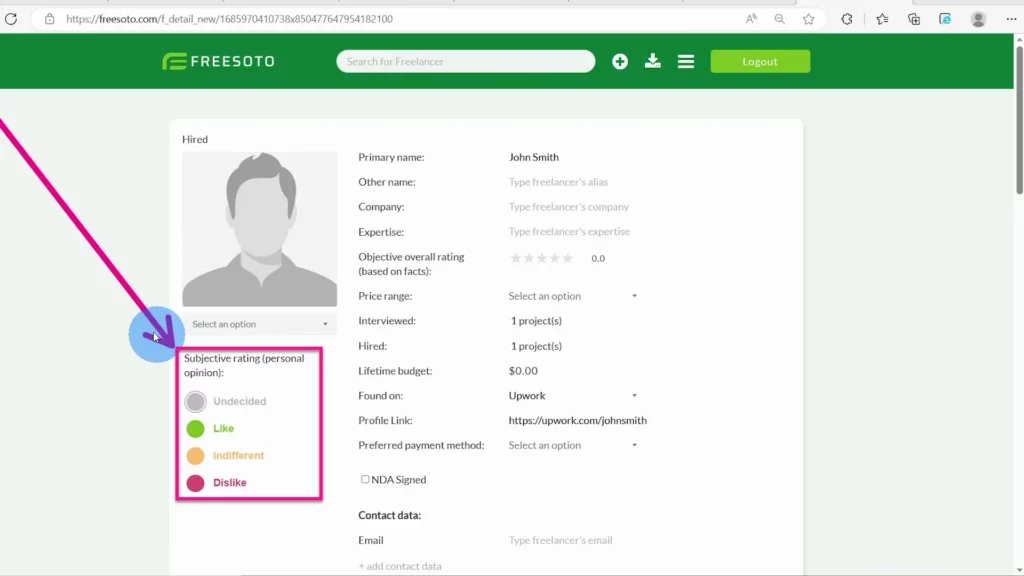
Below the freelancer’s image on the freelancer’s detail page, you can add your subjective rating. It’s your personal opinion about the freelancer. You can select from Undecided, Like, Indifferent, and Dislike. A freelancer can score well in objective categories, but you might not want to work with them because of personal reasons.
By setting your subjective rating, you are also setting the color of the freelancer card. That allows you to quickly discern the rating you gave to that freelancer.
How to use the help of conversation starters?
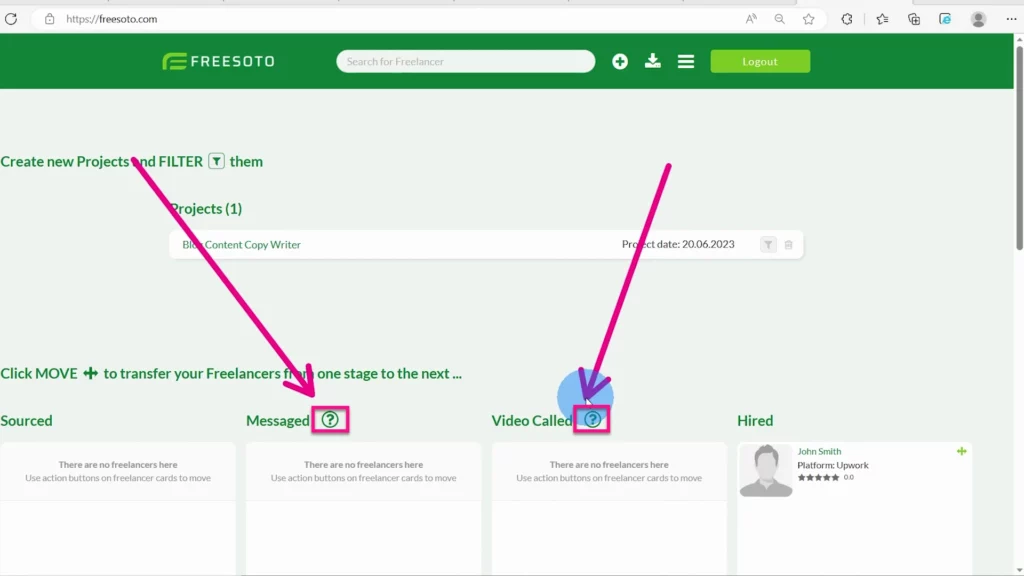
You have probably noticed these little question marks in Messaged and Video-called columns. These are conversation starters that can help you communicate better with freelancers.
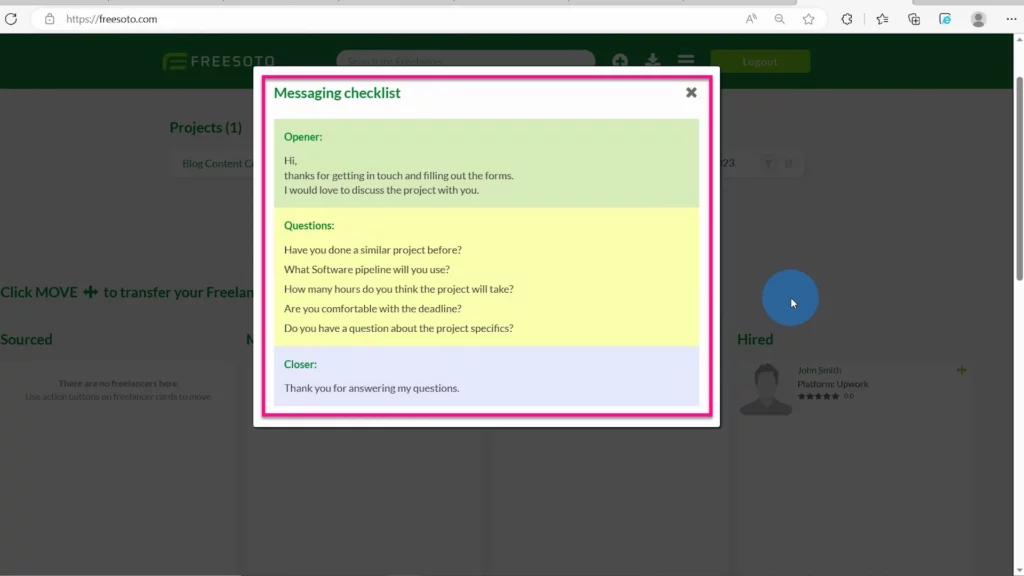
When you click on these question marks, you will see a window with various suggestions on how to start the conversation, how to end it, and what questions to ask. These are intended to give you some inspiration and guidance on how to lead the conversation successfully and ask the right questions.
How to search for freelancers or specific skills?
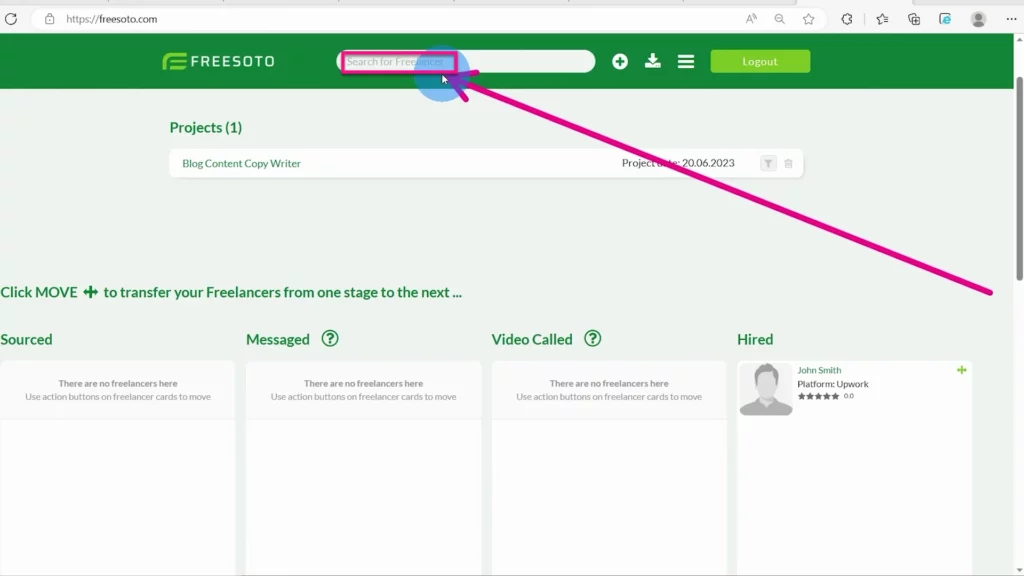
At the top of the navigation bar, there is a Search option. It’s a feature that helps you find freelancers by name or specific skill. Type in the freelancer’s name or a specific skill to see the results.
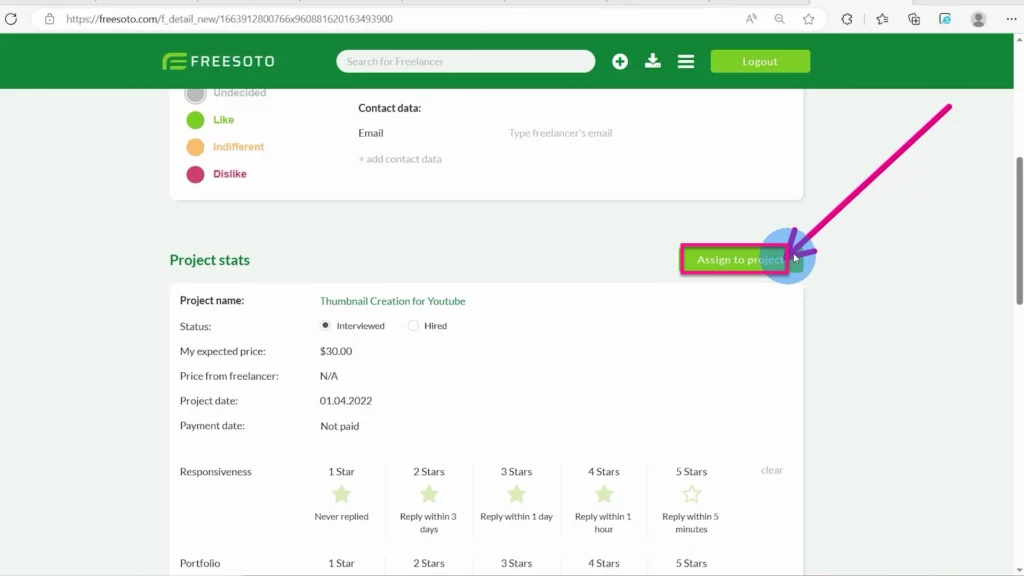
When you find the freelancer you need, open their detail page and navigate to the middle of the page. You will see the Assign-to-Project button. By clicking that button, you will assign the selected freelancer to a specific project.
You have now completed the hiring process! You can start working with your freelancers and, hopefully, achieve excellent results.
We hope this quick tour through our Freesoto application has been inspiring and useful.
Thank you for your time, and enjoy Freesoto!
