This tutorial will show you the process of successfully hiring freelancers on Upwork. As a client, I have been on Upwork for more than eight years, and I would like to share some tips and my best practices with you.
Finding a great new freelancer is difficult—you also need to be lucky. However, if you work diligently and stick to a proven process, it becomes easier.
I would have to say that my best tip is to work simultaneously with multiple freelancers on the same project. I find that this strategy works for me because I can compare the work that gets submitted. All freelancers move through a pipeline—from sourcing to messaging, to video calling, and finally hiring.
I will answer eight questions that will help you find a great freelancer.
How to create a job post on Upwork?
We begin with a lot of pictures, and I will give detailed explanations of each.
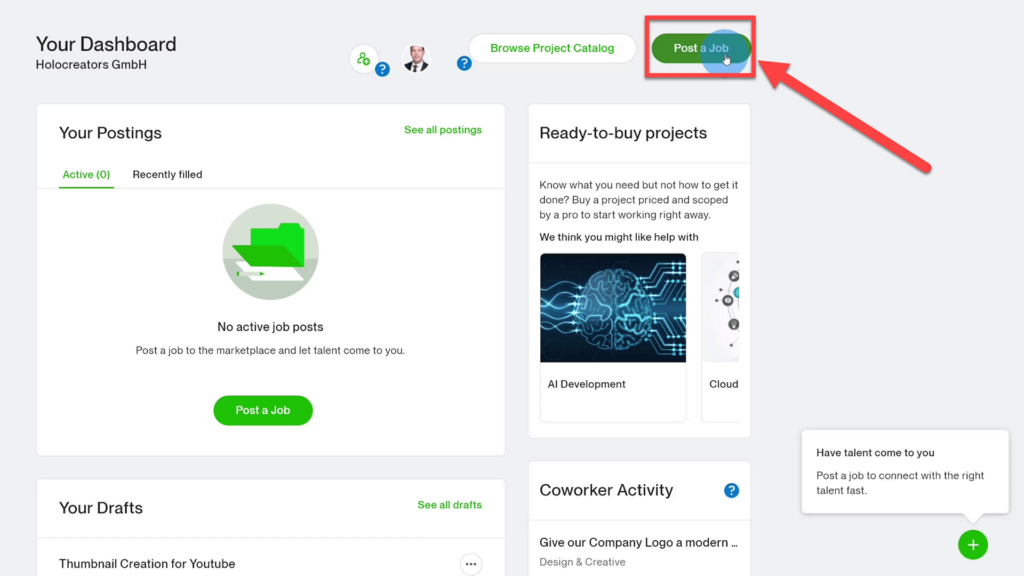
In your dashboard, click on “Post a Job” to create a new project.
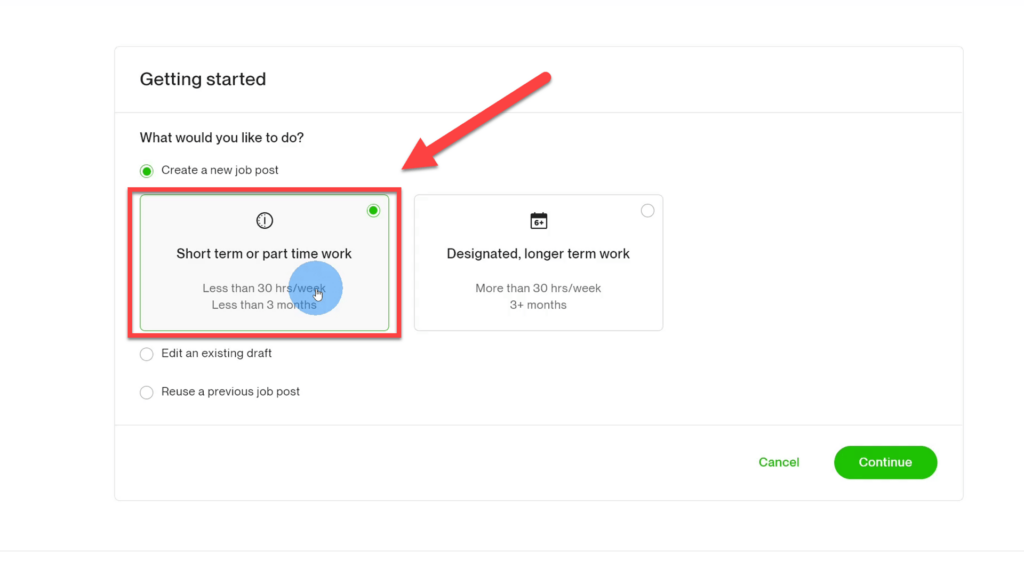
You always want to select “Short-term or part-time work”. The reason for this is that you are looking for a new freelancer. When hiring a new freelancer, it’s best to start with a small project as a test. Otherwise, you could be wasting money on a freelancer whose performance is uncertain.
For this reason, when you have a big project, it’s best to work with freelancers that you have worked with before—one with a proven track. Furthermore, you can also hire an Upwork freelancer you’ve worked with directly by clicking on their profile.
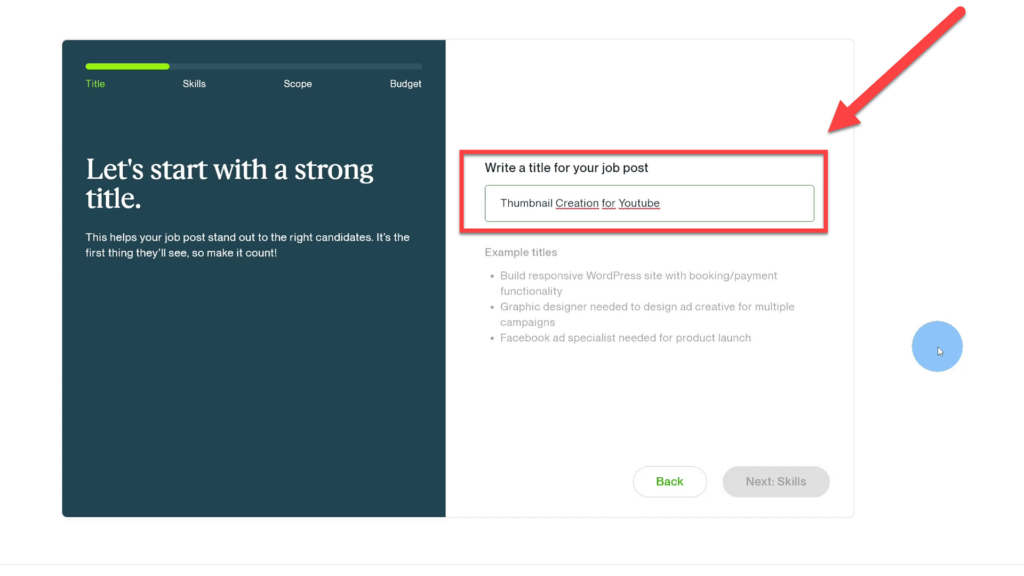
Crafting a clear and catchy title is important. It should state exactly the service that you need. Make it short. It’s what freelancers see first when searching Upwork for a job. So make it clear and concise to attract as many freelancers as possible.
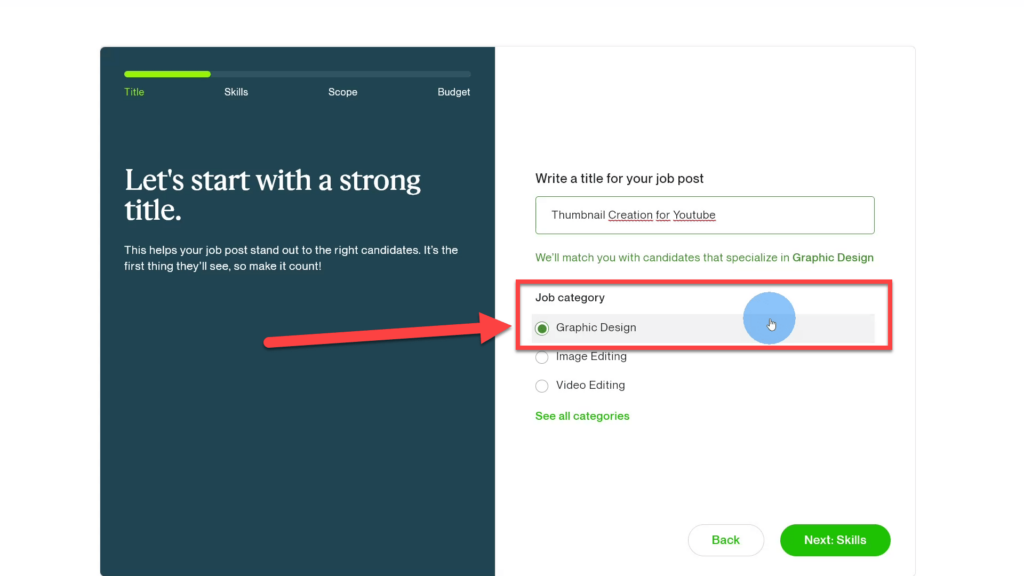
Based on your title, Upwork will automatically suggest a category. This is important because when new freelancers open an Upwork account, they are put into a category depending on their skills.
So, for example, a graphic designer is put into Graphic Design and an engineer into engineering.
However, an engineer can’t apply to graphic design jobs. Therefore, if you’ve selected the wrong category, freelancers with the skillset you’re looking for won’t be able to apply for your job.

You can choose more skills that the freelancer should possess.
This is not really important. Just add one to continue this step. The more skills you specify here, the more you narrow the pool of freelancers that will apply to your project.
So keep it broad.
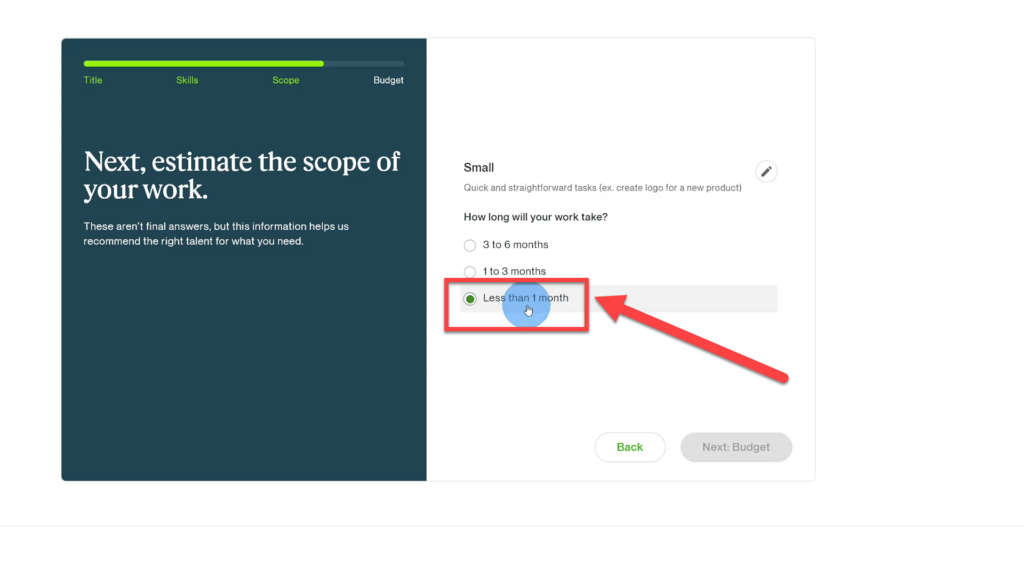
When searching for a new freelancer, start with a “Small” project and limit the project length to ”Less than one month”. Again you are doing a small project to test the freelancers. It’s a bad idea to hire a new freelancer for a big project—that’s just foolish. If you already have a specific freelancer in mind because you’ve worked with them before, you can directly hire them by clicking on their profile.
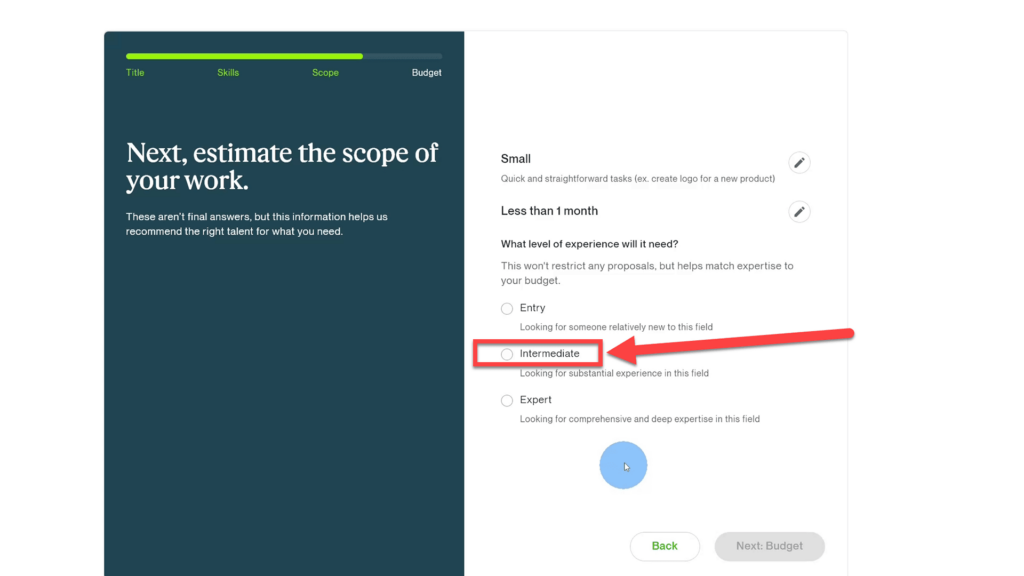
When asked about the experience level I am looking for, I always choose intermediate. I don’t want a beginner—and experts tend to be unreasonably expensive. So, for starters, choose ”Intermediate”. The experience level is not really important at this stage because it doesn’t affect the kind of freelancers that apply for the job.
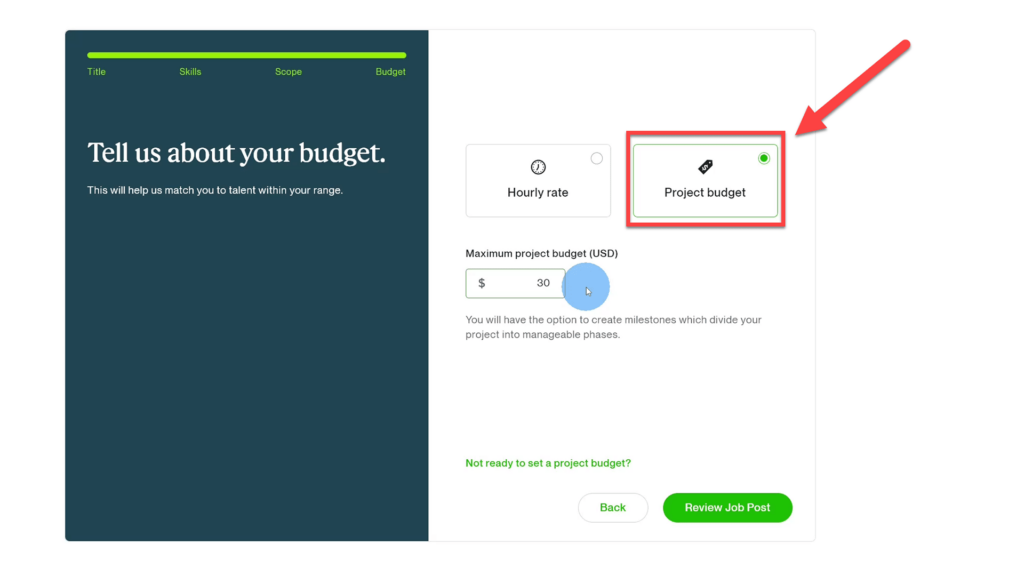
When defining the budget, you should always choose “Project budget” billing type. Only clients that don’t know what they want choose the hourly rate.
The hourly rate encourages the freelancer to take as much time as possible with your project. It sets the wrong incentives.
The project budget should closely correlate the project brief and be appropriate compensation for the work to be done. You should write a very detailed project brief. After doing so, you will have a good sense of how much the project will cost. The price you set is only a starting point. Freelancers will be able to make a counter offer—higher or lower. And only after you accept their price will the contract start.
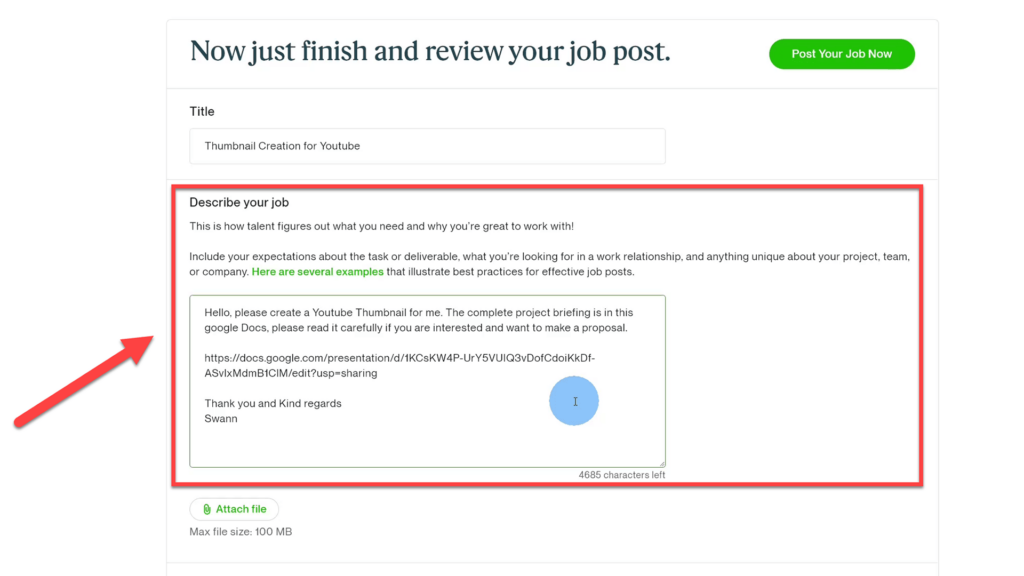
Next, you are asked to write a description and review your job post before it goes live. You should keep your job description in the Upwork window very short and refer to an external google file where you link to the detailed job description.
In my case, I wrote:
Hello, please create a Youtube Thumbnail for me. The complete project brief is in this Google Slides. Please read it carefully if you are interested and want to make a proposal.
https://docs.google.com/presentation/d/1KCsKW4P-UrY5VUIQ3vDofCdoiKkDf-ASvlxMdmB1ClM/edit?usp=sharing
Thank you and kind regards. Swann
You do this because Google Slides allows you two write a much more comprehensive project description, and, more importantly, you can update it on the fly.

Upwork allows you to attach a file to your project brief. Don’t do this. Freelancers always have a hard time finding and reading any attachments. Put all relevant information into the Google Slides.
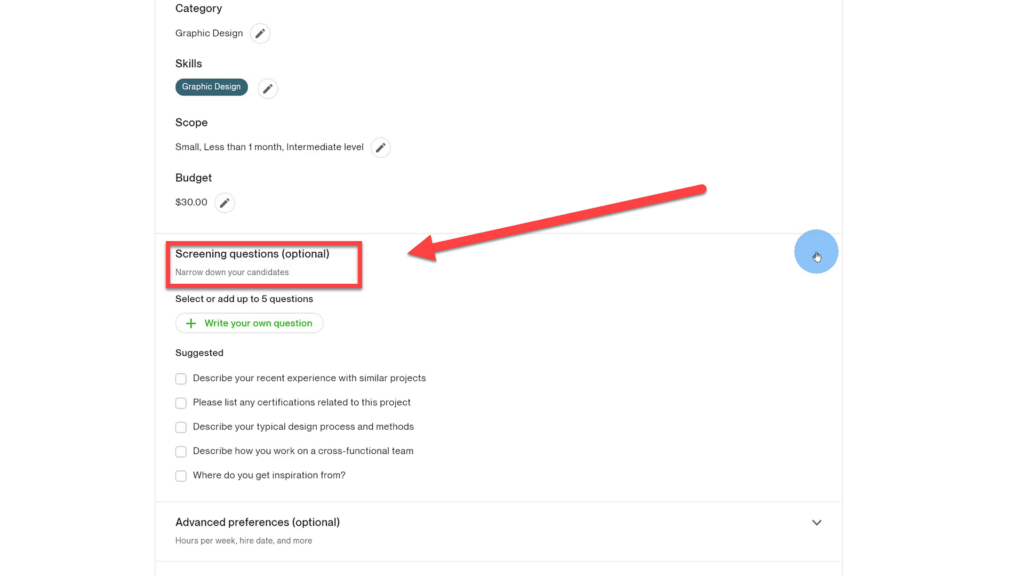
You have the option to add screening questions for your job post. Leave this empty. You should include your screening questions at the end of your project brief in Google Slides. This way, it helps to ensure that the freelancer has read them because they’re all in one place.
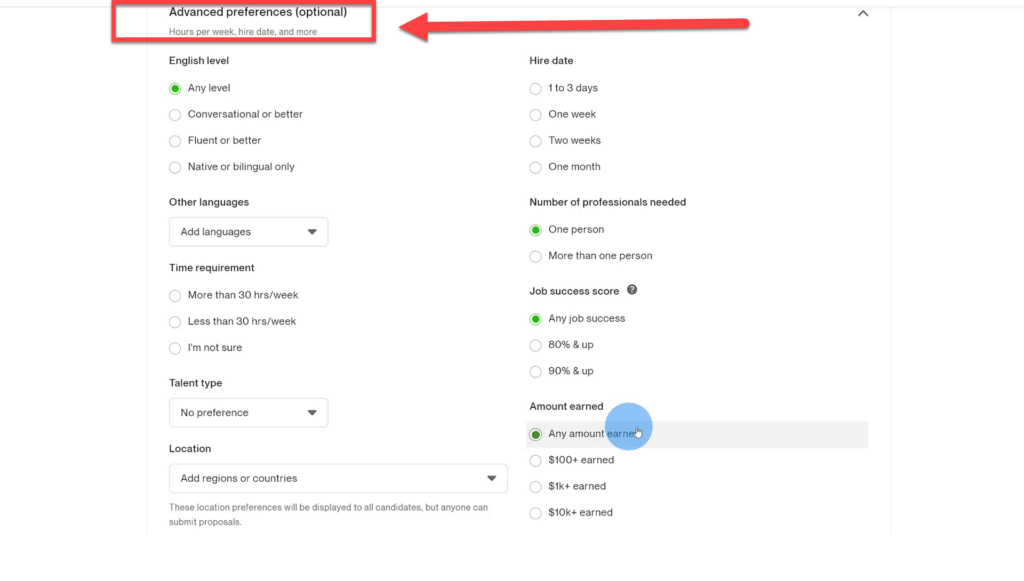
I would leave the advanced preferences at their default settings. They unnecessarily narrow the number of people that will see your job post. And you want to get as many proposals as possible. You can filter out freelancers later after you have received their proposal. There’s no reason to do it in advance.
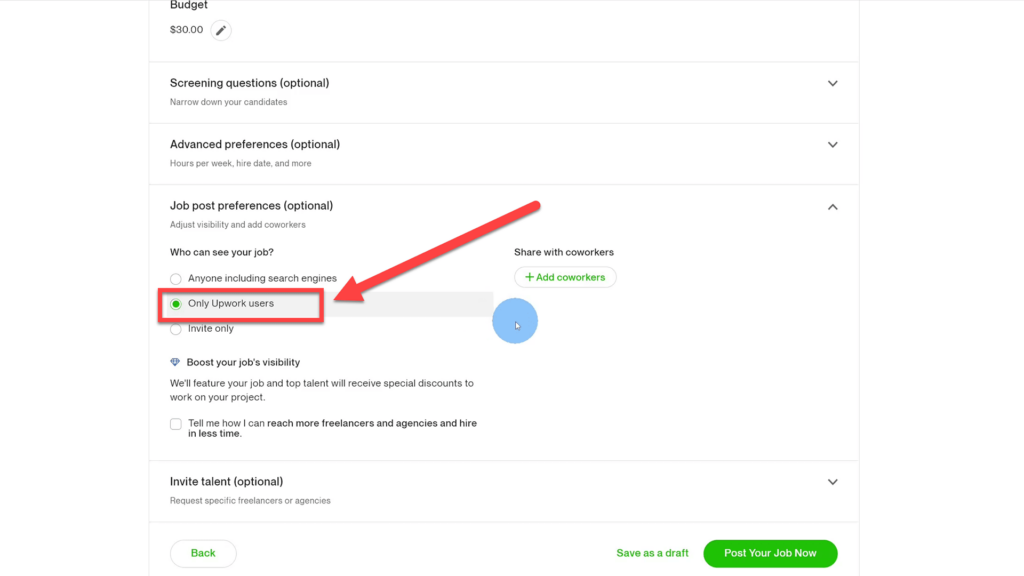
You should set this to “Only Upwork users”. You don’t want your job to be searchable on Google. A normal “call for bids” on Upwork takes around three days. By then, Google won’t have indexed your search anyway, so there is no reason to have it there.
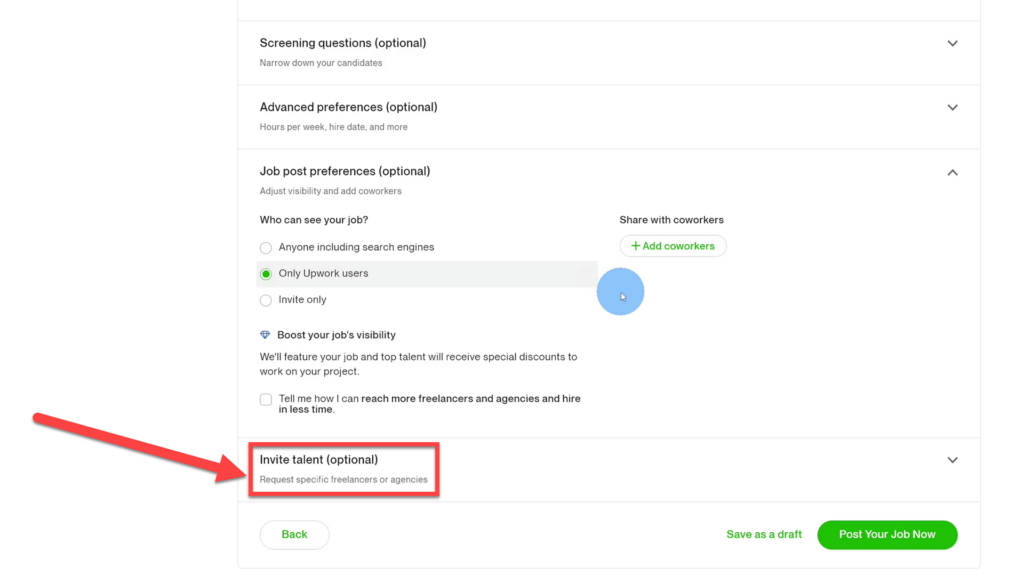
Also, you should leave the “Invite talent” drop-down menu empty. You can do this after you have posted your job.
How to write a project brief with Google Slides?
As a client, you need to tell the freelancer exactly what you want. All the information should be collected within a comprehensive project brief. The project brief forces you to think precisely about the job requirements. Over the years, I have created and refined a template for writing an effective project brief. You can access it through this link:
https://docs.google.com/presentation/d/1lGMWZEGwhlw8z2MhIXdJiAU_6cz04sImg7FFWzfeBdw/edit?usp=sharing
Another benefit of working with Google Slides is that you can update the brief on the fly. During the later interview phase, freelancers will tell you if they had any trouble understanding the brief. You can instantly make changes in Google Slides to clarify questions, and it will automatically update your posting.
A project brief should contain four kinds of slides. One download slide. One title slide. The description slides. And one comprehension slide. I will go over each slide in more detail.
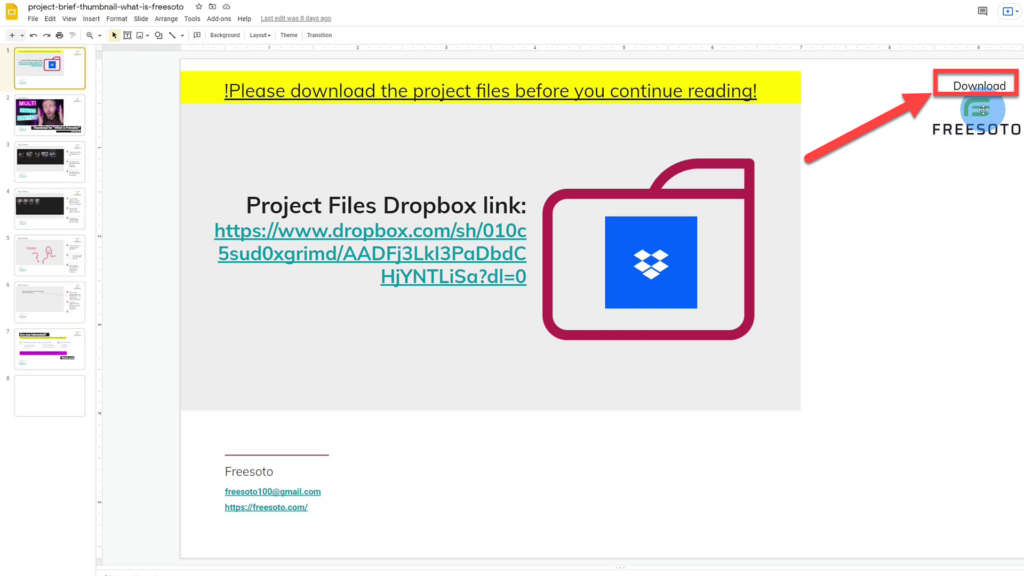
The download slide directs the freelancer to Dropbox, where they will find all the files associated with the project—images, videos, and audio.
Freelancers often have a hard time finding and downloading project files. Therefore, I put them on the very first slide, so they can’t be missed.
You could link to your Dropbox, Google Drive, or any other cloud-storage platform.
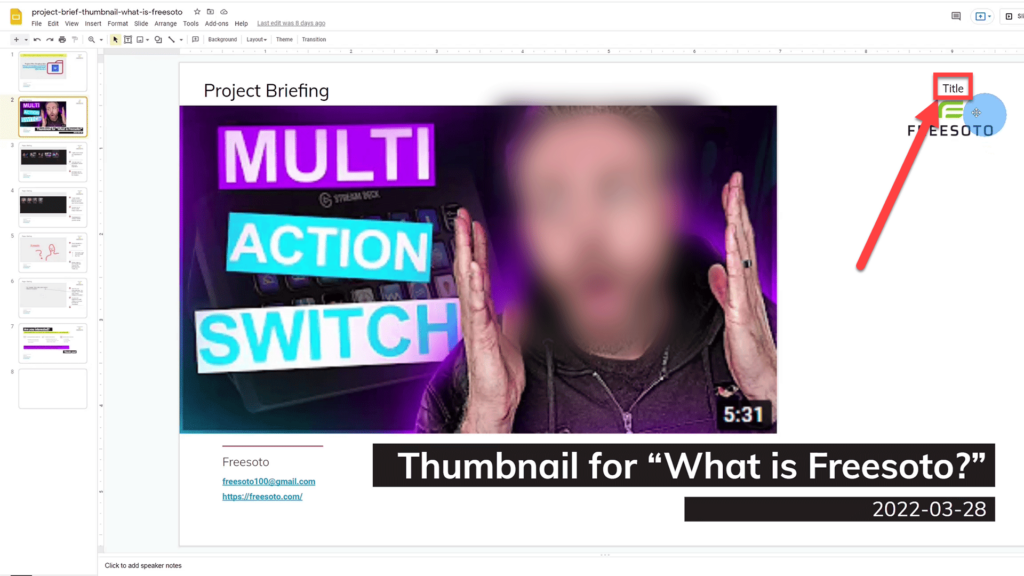
The title slide(s) is there mostly for aesthetic reasons, and so job seekers know, at a glance, what the project is all about.
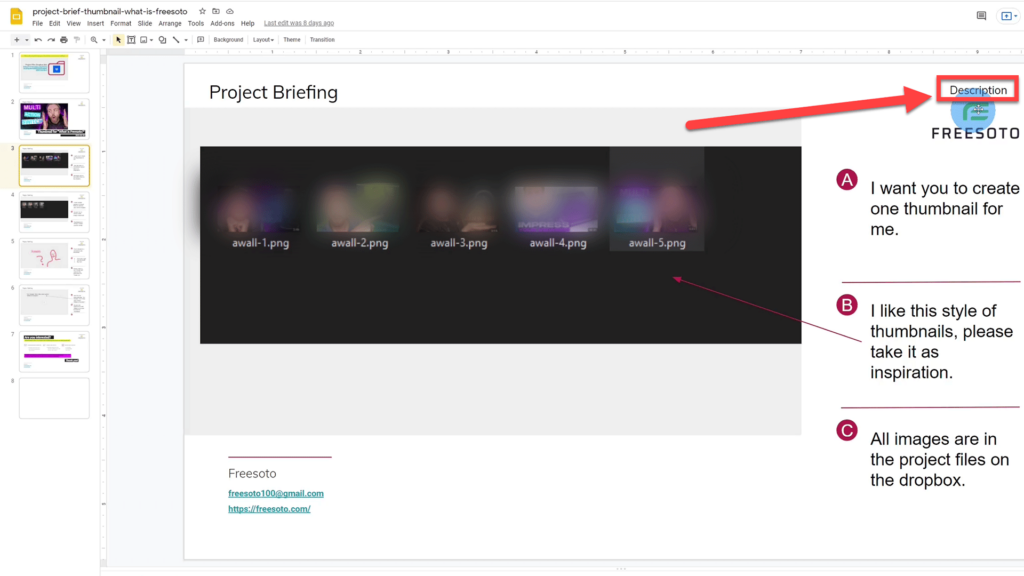
The description slides contain all of the project’s deliverables. These slides are crucial for a successful project. The structure is always the same. On the left is a big image, and on the right, there are letters (A, B, C, etc.) that separate and detail the different tasks.
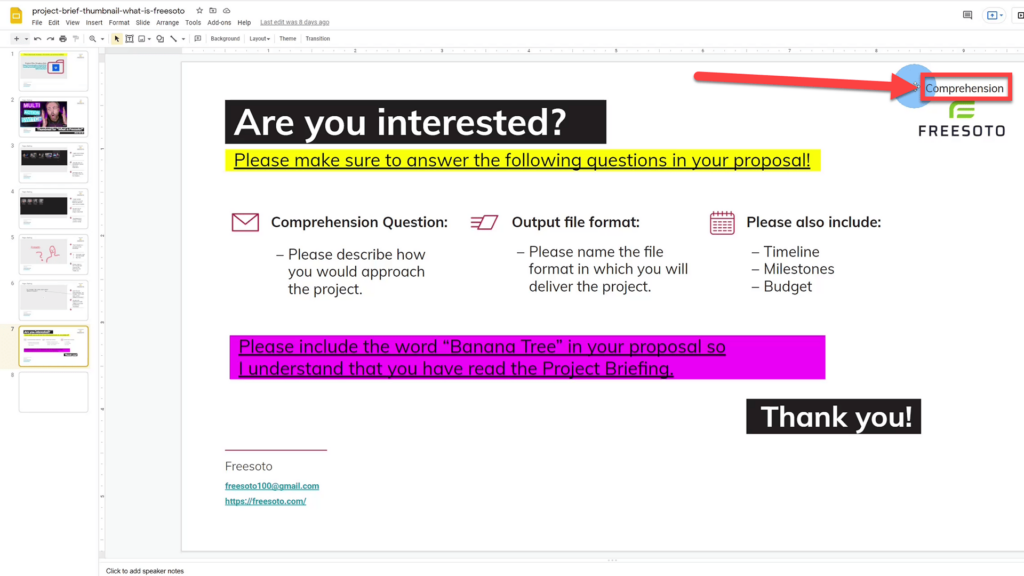
The answers to the questions in the comprehension slides give you an idea of how well the freelancer will perform—even before you have hired them. If they answer all the questions elaborately and diligently, that’s a good sign that they will also work very conscientiously on your project.
Think of this as a free test of the freelancer without the need to even hire them.
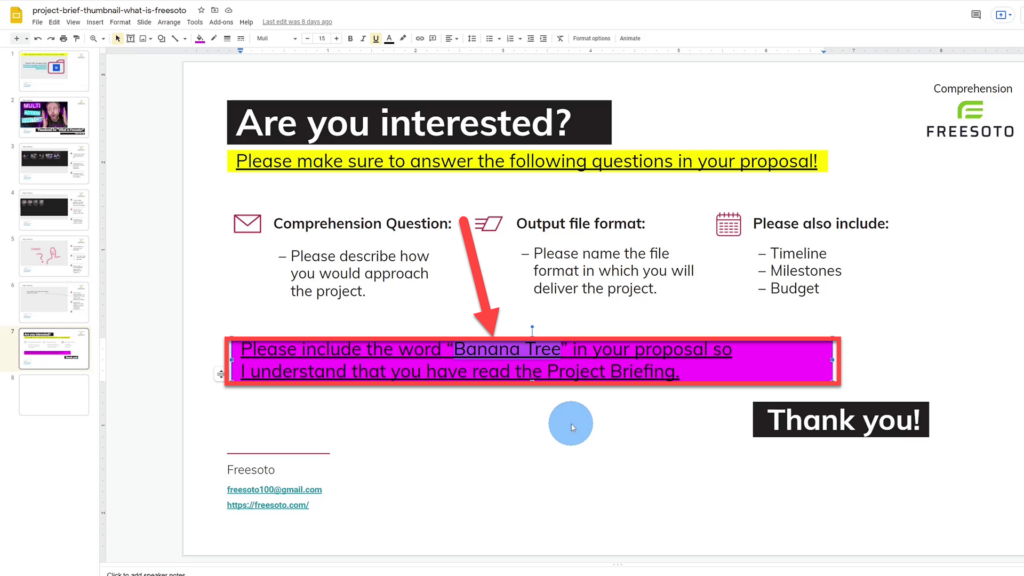
Unfortunately, there are some project spammers on Upwork who reply with a proposal to your job post without even having read the project brief.
With an anti-spam question, it’s very easy to spot them. Because if they don’t include the code word into their proposal, in this case, “Banana Tree”, then you know they have not read it.
How to invite freelancers to your Upwork job posting?
With the invite function on Upwork, you can reach those freelancers who are currently not actively searching for a job.
Freelancer invitations are very useful when you require a very specific set of skills. The more specific the skillset is, the more you will need to actively invite freelancers to your job posting.

Upwork allows you to invite 15 freelancers to your job. If that’s not enough, you can pay another 30 USD to pay for a “featured jobs” listing, which allows you to invite an unlimited number of freelancers.
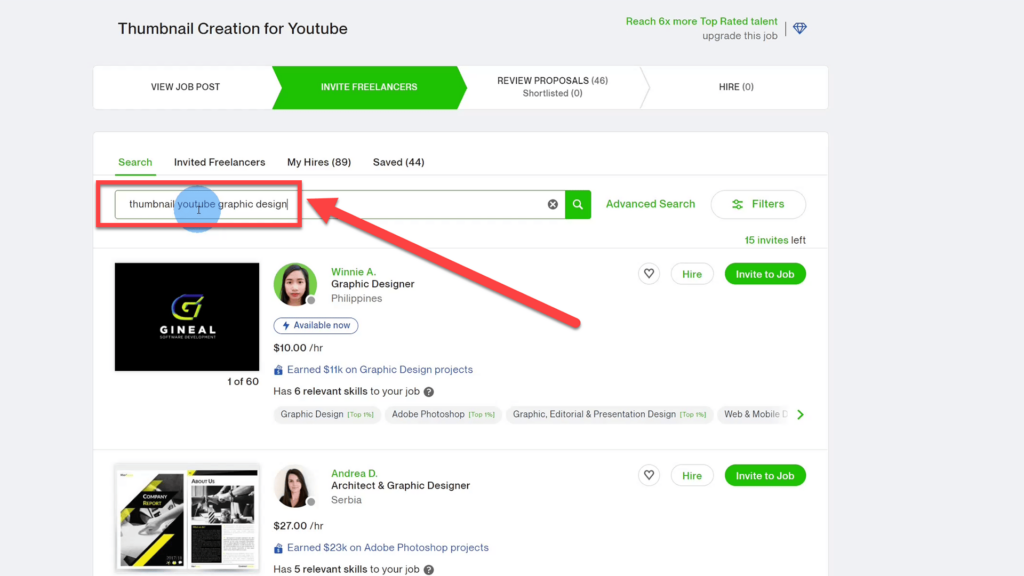
Type in all the skills you need. The more specific the skillset, the fewer freelancers will be displayed. You need to experiment a bit with the skills you are searching for, the results are sometimes not that great, so you will need to alternate keywords. In my case, I am looking for a “thumbnail youtube graphic designer”.
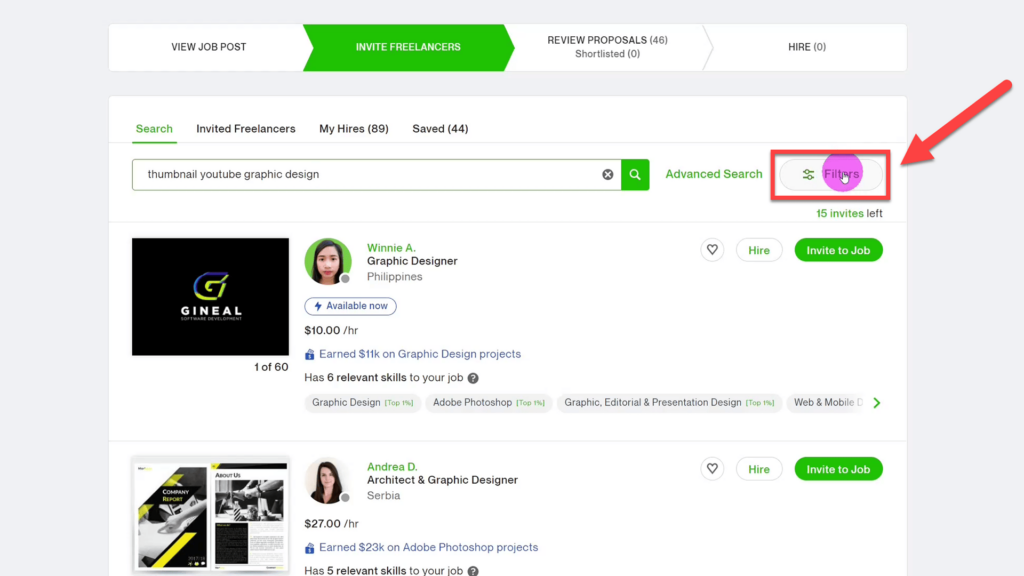
Upwork will show you a long list of freelancers after you type the keywords into the search bar. By clicking on the filters button, you can choose further freelancer attributes to narrow the search.
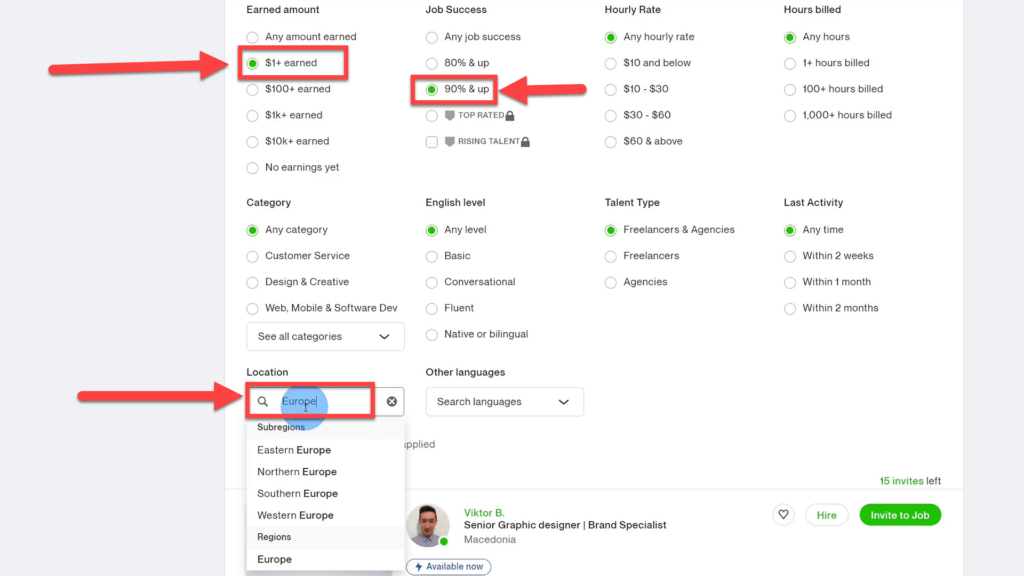
There are many filters that help you narrow down the freelancers which Upwork will display. You should set the amount earned to at least $1. This way, you make sure that the freelancer has worked at least once before on Upwork.
I always choose a Job Success Score (JSS) above 90% because clients are already very generous with their ratings on Upwork. For a freelancer to have a rating below 90%, they must be really bad. All other fields you can leave at their default value except for the location.
I would recommend you work with people in your own time zone. It can be problematic to work with people in other time zones because they may not make themselves available during your business hours; therefore, there can be delays in communication.
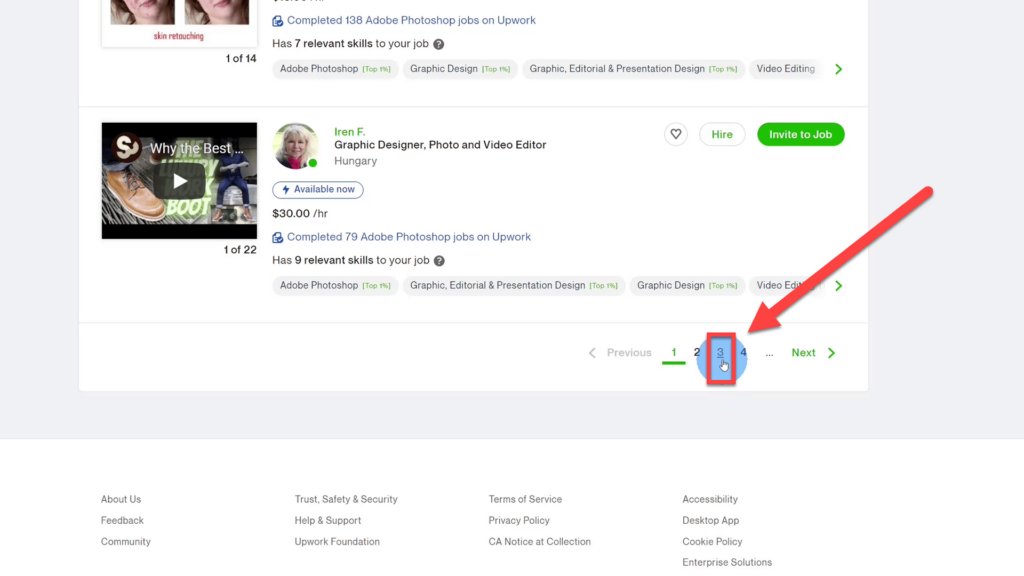
Upwork will push their favourite freelancers and best earners to the top of the freelancer list. To find more hidden talent, check out pages 3 and 4.
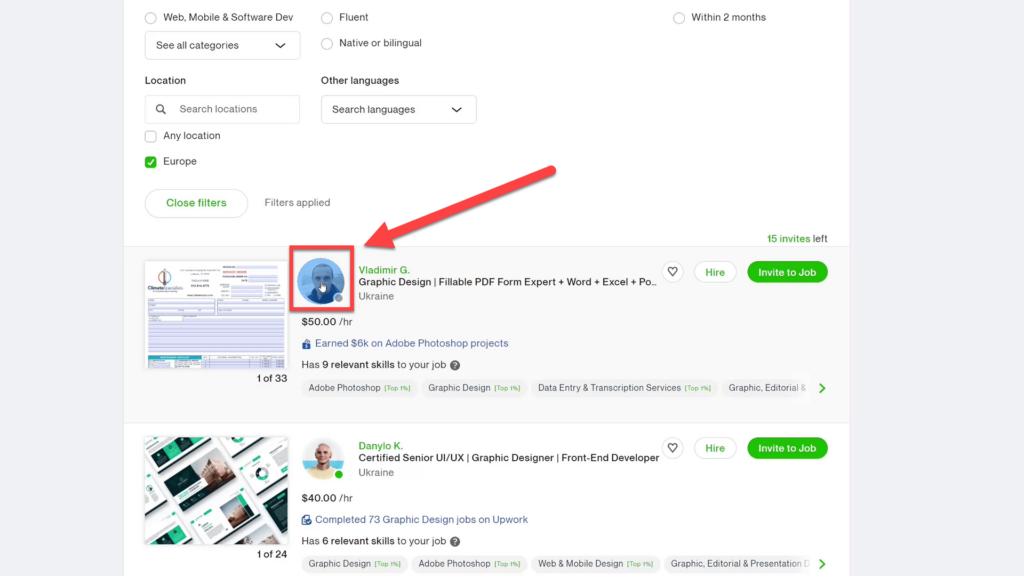
When looking through the list, click on the freelancer picture to get to view their profile. If you are happy with it, proceed with the next step.
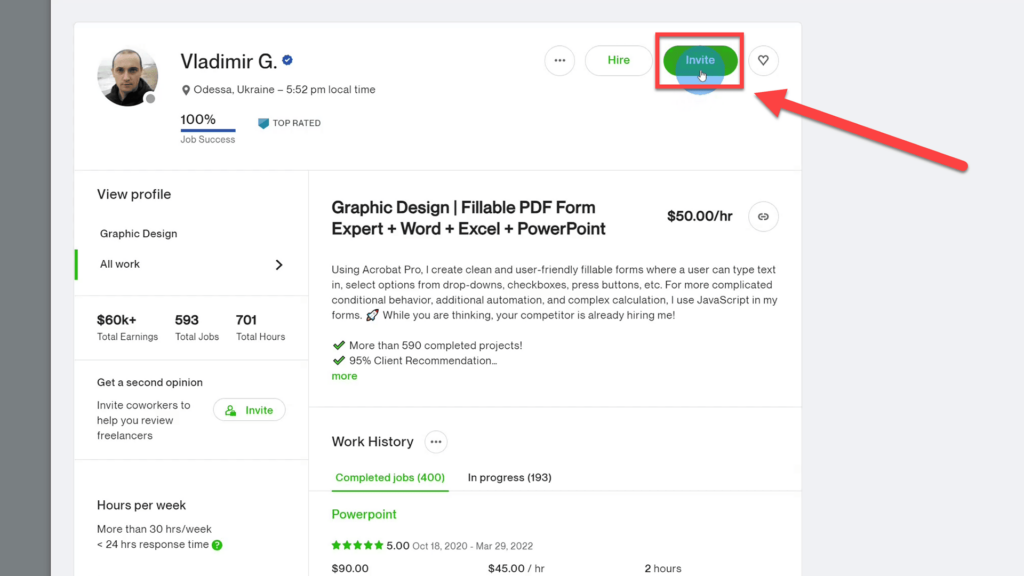
Click the “Invite” button at the top right to invite the freelancer to your job. This gives you a chance to check out their profile before you invite them. Keep in mind you only have 15 invites, so make them count.

Upwork has a default message for inviting freelancers. You also have the option of writing your own custom message. However, I wouldn’t bother. I have realized that it doesn’t make a difference. The only important thing is that the freelancer gets notified through the Upwork system.
You should use the 15-freelancer allotment of free invites that Upwork allows. You will get much higher qualified freelancers for your task this way. If you pay for the premium job you get a bigger allotment of invites. 65 Invites every 24 hours.
How to read a freelancer profile on Upwork?
An Upwork freelancer profile is a great source of information on the individual. There are some things you should pay special attention to like, rating and hours worked, and less important things like the hourly rate. With every profile, pay attention to the overall presentation—note if it’s done nicely with a lot of care. There is a good chance that your project will be done well too.
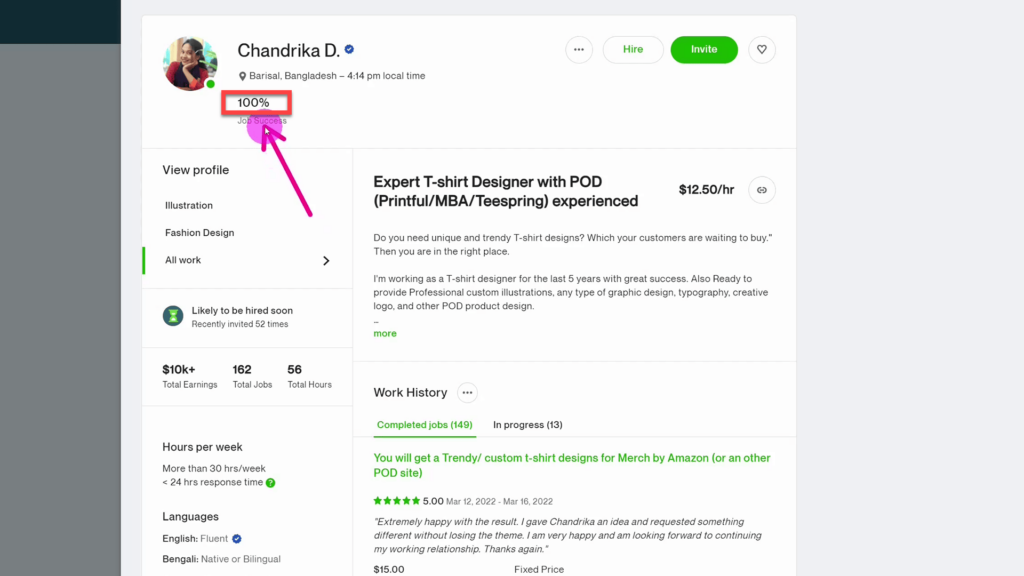
You want to make sure that the freelancer’s Job Success Score is 90% or above. Clients already give very favourable reviews on Upwork. For the freelancer to score below 90%, there must be something seriously wrong.
Keep in mind that the freelancer always has the option to return the money if a project went poorly. So I don’t even understand how a rating below 90% is achievable.
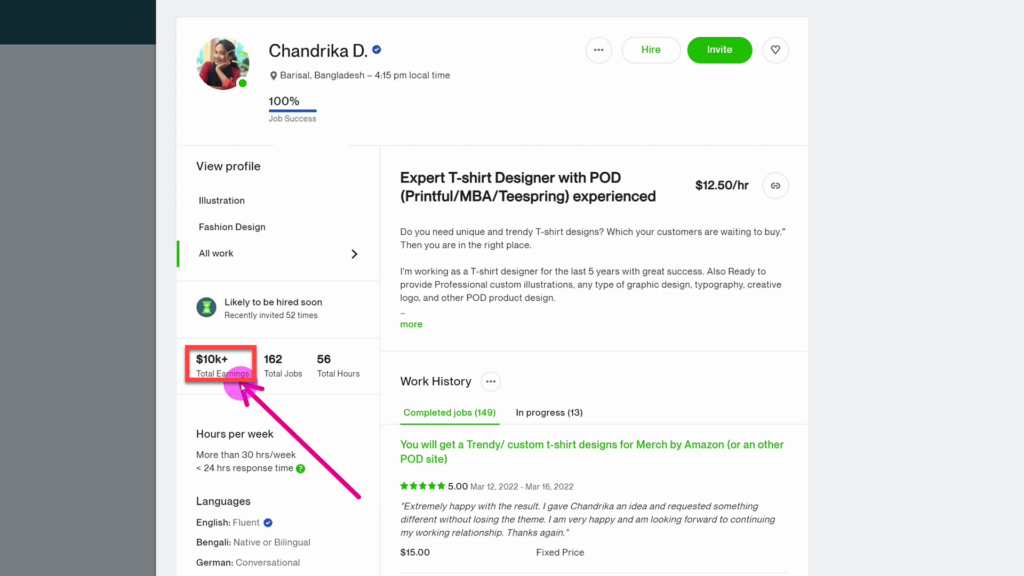
The freelancer should have total earnings exceeding at least one dollar. That means that they have worked on at least one project successfully and were paid for it. Even better are earnings above $1000. That usually means they have completed at least a few successful projects.
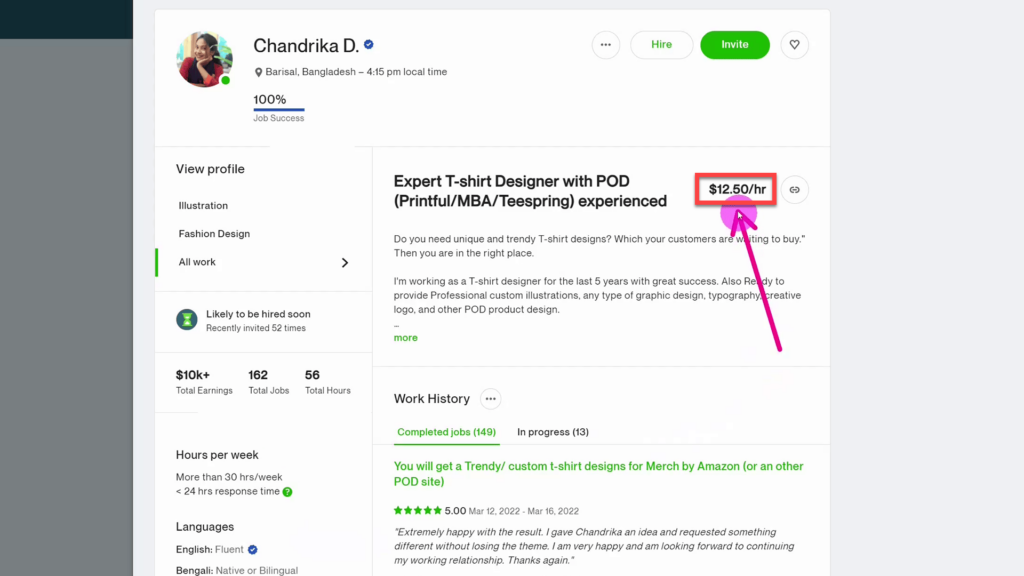
Freelancers can state their hourly rating freely on Upwork. This results in freelancers with high hourly rates of maybe $70/hour doing fixed-price projects for $5. It makes no sense. There is even an incentive to choose a high hourly rate because of the snob effect. Clients tend to perceive people with a high hourly rate as more professional, but this is just unjustified.
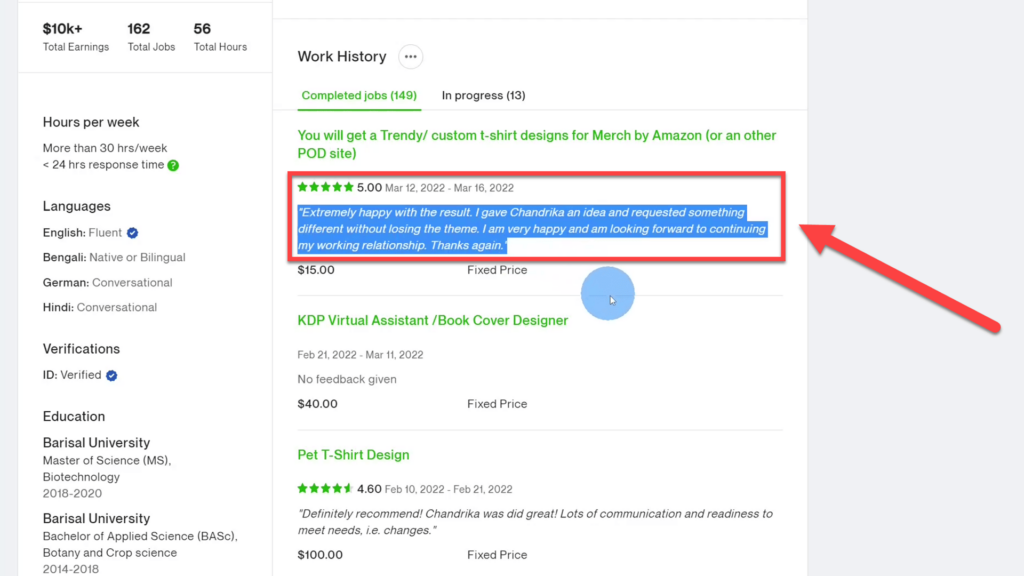
Check the work history for long positive reviews praising the freelancer. This is a good sign that they will work on your project diligently as well.
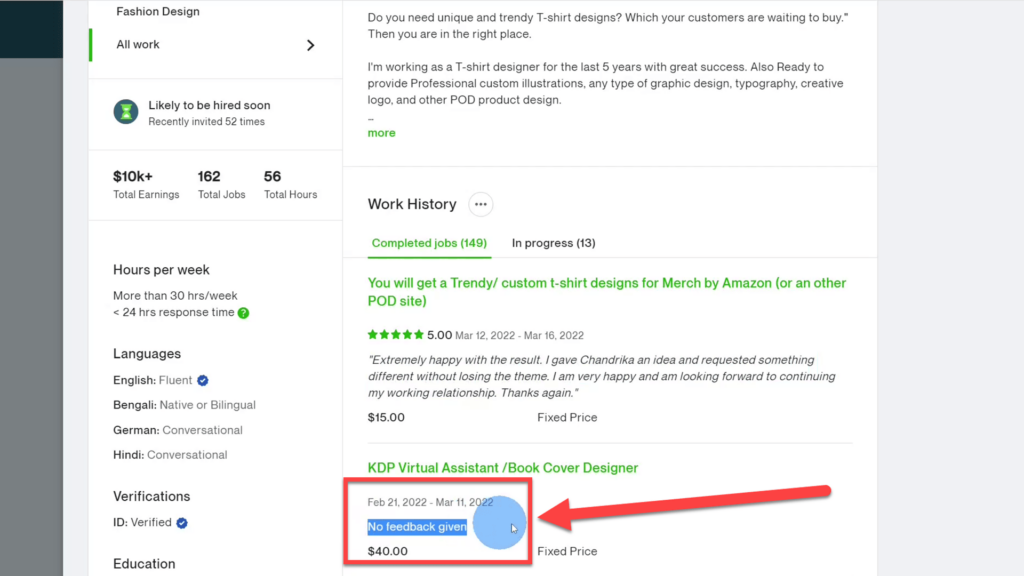
Be careful if you find many projects without feedback. This usually means that the client was so frustrated that they didn’t even want to give a review. Even a five-star rating with “no Feedback given” is a red flag.
How to interview freelancers on Upwork?
You should wait for at least 24 hours between posting your job on Upwork and the start of your interview process. You should allow some time for freelancers to find your post on Upwork and reply with an offer. The freelancers who reply instantly to your job post might not be the best. After you have waited, go through the list of all the freelancers that have replied.
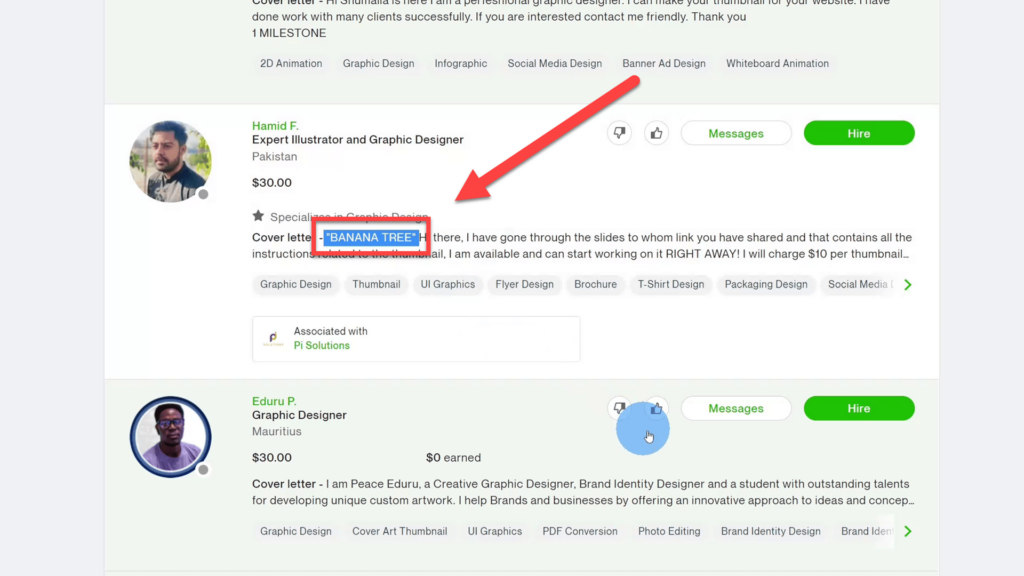
You want to go through the list of all the people that have replied and search for the “code word”, that you have requested in your project brief. If it’s not included, you know the freelancer has not read the brief.
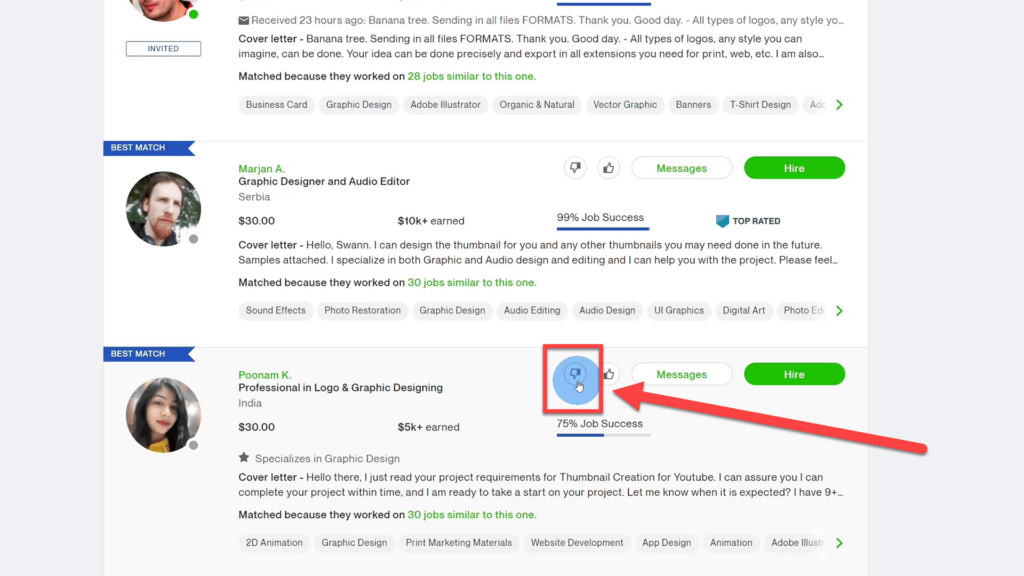
By clicking on the thumbs-down icon, the freelancer will be removed from the offer list. However, they are not automatically deleted from your applicant history, you can still find them in the archived list.
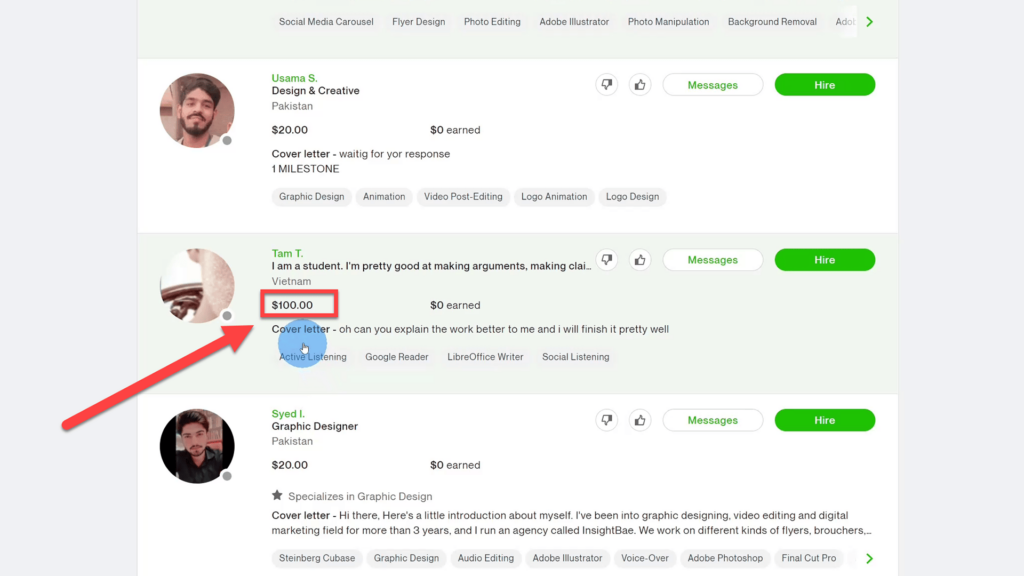
With a quick glance, you can see the offer the freelancer has made. It could be a counter offer which is higher than the price you suggested. Depending on your budget, you can filter out the freelancers that are too expensive.
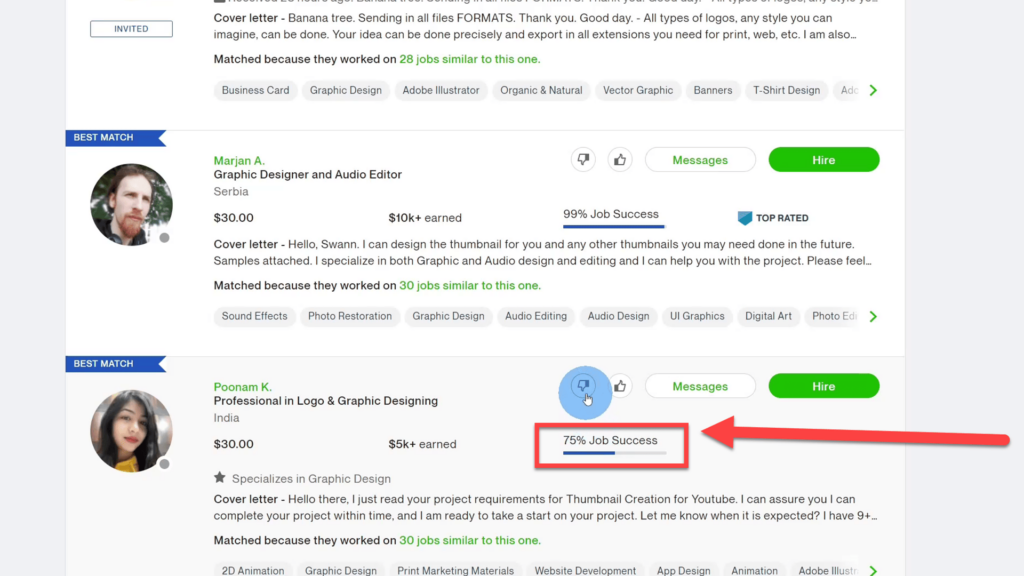
The past job success of a freelancer should never be below 90%. I have mentioned it before. For a freelancer to score a rating under 90%, they must be really bad. They must have done multiple projects where the clients were really unsatisfied. Clients on Upwork already rate very favourably, so filter those freelancers out immediately.
Of the remaining freelancers on your list, check out their portfolios in detail. It should be put together nicely, and the past reviews of other clients should be favourable.
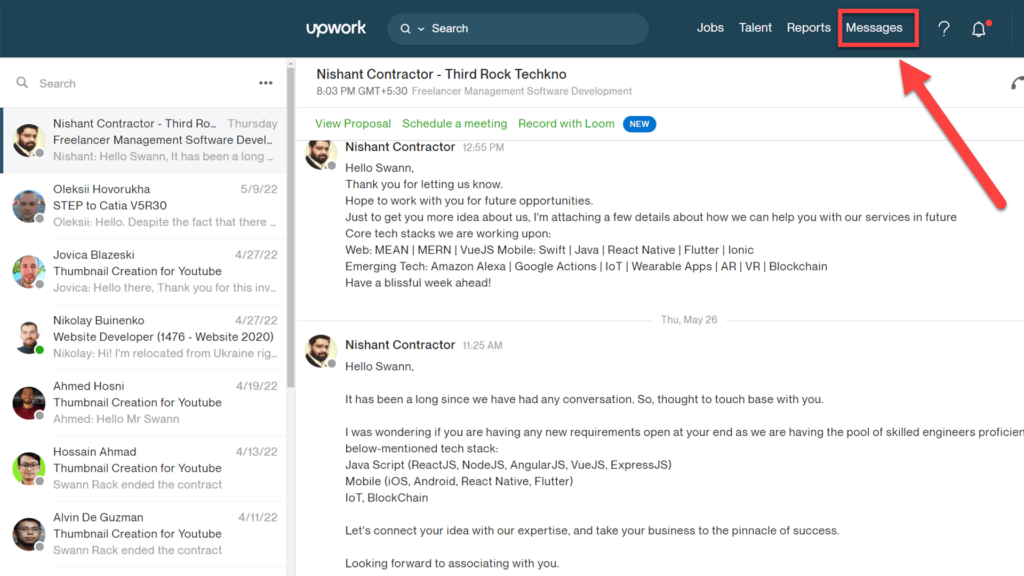
Once you have decided that you want to get in touch with a freelancer, message them. You should ask questions like:
- Have you done a project like this before?
- What is your current availability?
- Do you understand the job?
- Do you have any questions for me?
Be aware of freelancers that want to jump into a video call without writing the answers to your questions in chat. Especially agencies like to do this. Their “Project Managers” want to jump into a video call with you immediately—only during the video call will they start thinking about your project. It’s super annoying and a waste of time. The freelancer should have thought thoroughly about your project before you do a video call.
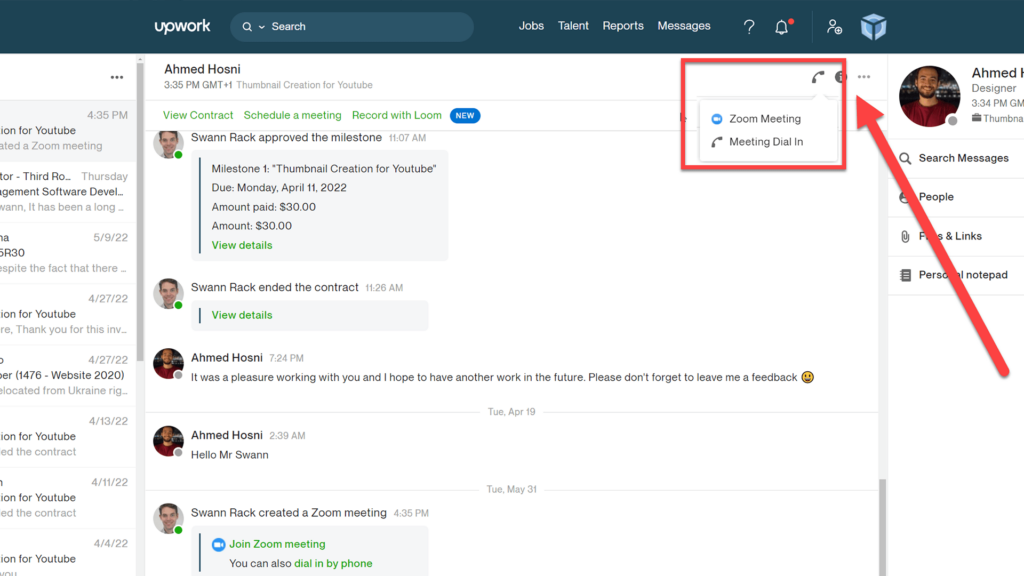
Upwork has the integrated option of starting a video directly in chat. It only allows you to immediately start a video call; you can’t schedule a call like you normally would do with Zoom, so that’s a little annoying—otherwise, it works fine.
Make it a habit of asking the freelancer beforehand if you may record the video call. You should save the video file, especially if you interview many freelancers. When you want to remember what a person was about, this is very helpful. If the freelancer doesn’t want to be recorded, then this is again a red flag, and you should not work with them.
A video call should be short, five minutes is enough. After that point, the freelancer should have already answered all questions satisfactorily in chat. You just want to get a feel for the person during the video call. You can tell so much about a person when seeing them live.
- Are they on time?
- Are they friendly?
- Can they speak English?
If everything goes well, then hire the freelancer. And don’t just hire one person for your job. Hire three freelancers at the same time. It is more expensive, but it allows you to compare the work they will submit. After all, you want to find the best person for future work.
How to work in Freesoto?
The interview process with many messages and video calls can be long and strenuous. To make it easier, we have created a tool called Freesoto. It helps you stay organised while you find the best freelancer for your job. It also keeps track of all information about all individual freelancers that can get lost easily along the way.
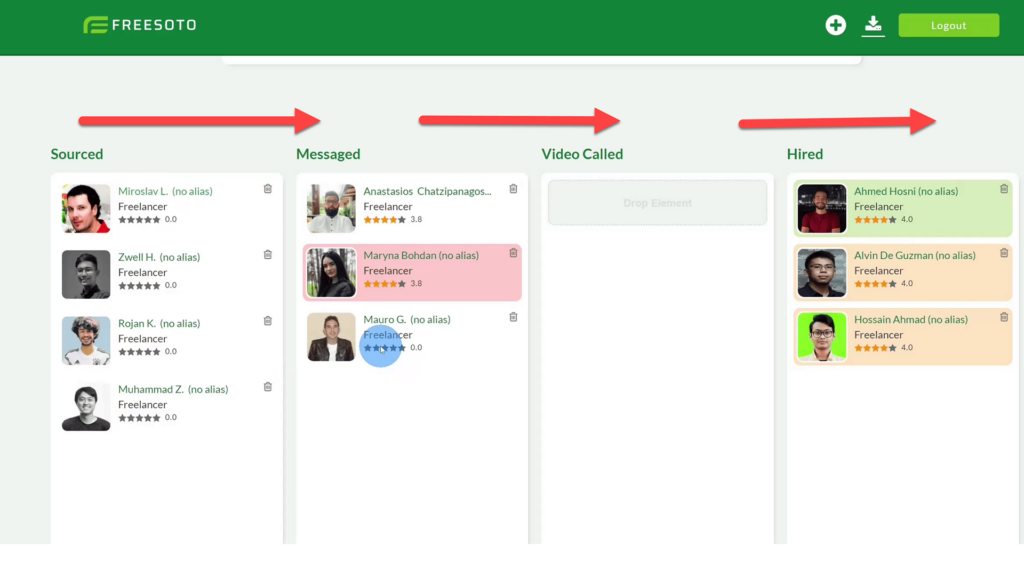
Freesoto, in its default view, shows you a kanban board, and the freelancers move through a funnel from left to right. Think of it as stages through which all freelancers must progress.
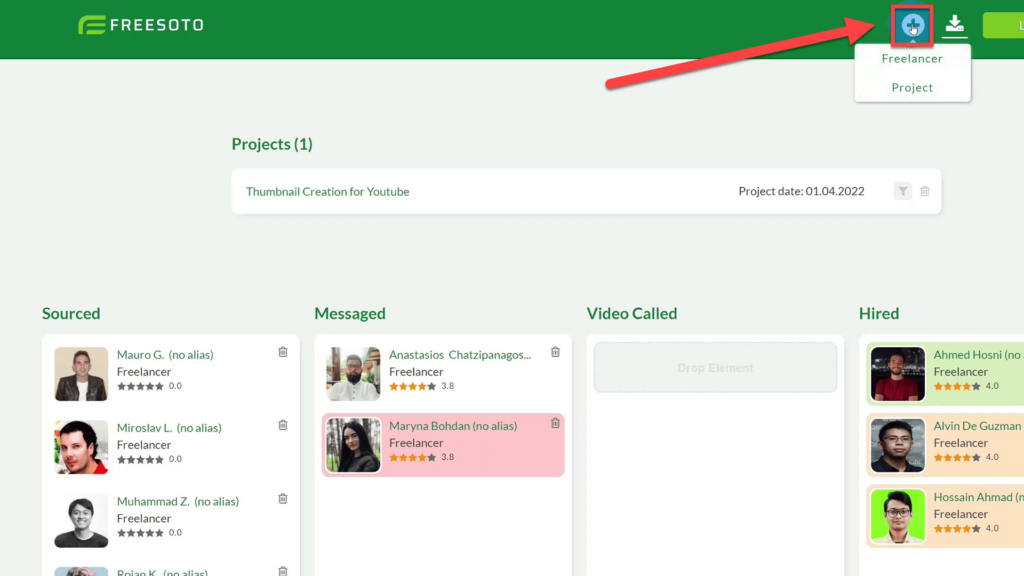
The plus icon opens a drop-down menu where you can add a new freelancer or a new project. A new freelancer will then be added to the sourced column.
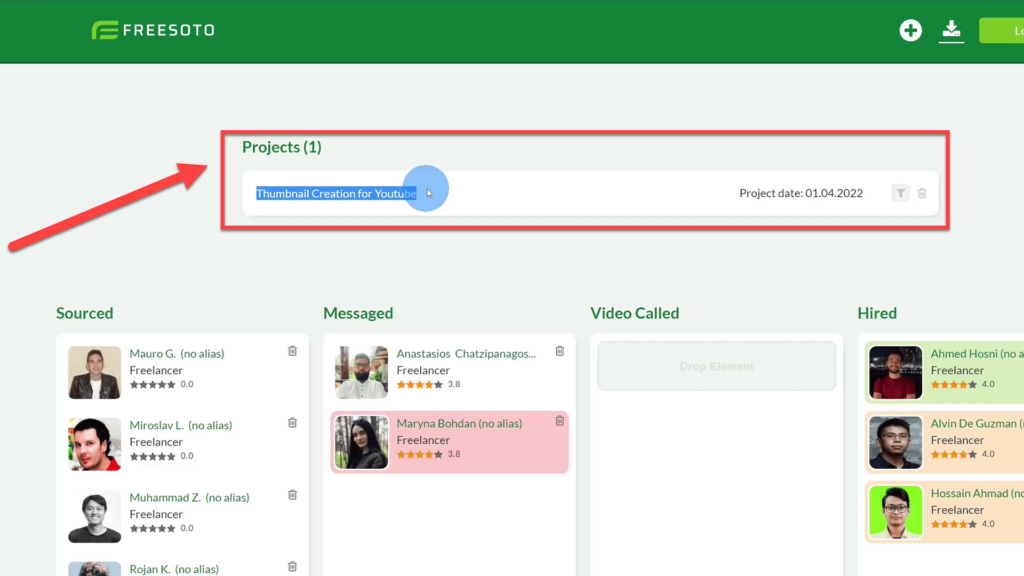
The project list sits at the top of the kanban funnel and shows all current projects. You can see that my only currently active project is “Thumbnail Creation for Youtube”. If I have more projects, they would all be listed there. I can assign freelancers to certain projects. This also allows me to filter freelancers for certain projects.
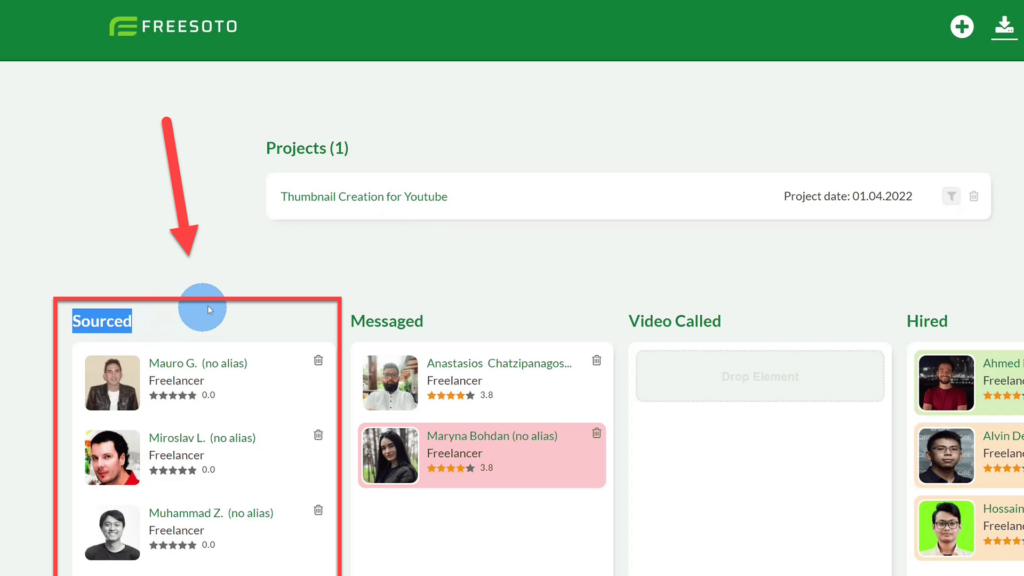
On the very left is the sourced column. This is the top of the funnel. All new freelancers start out in this column. From there, they move through the other columns.
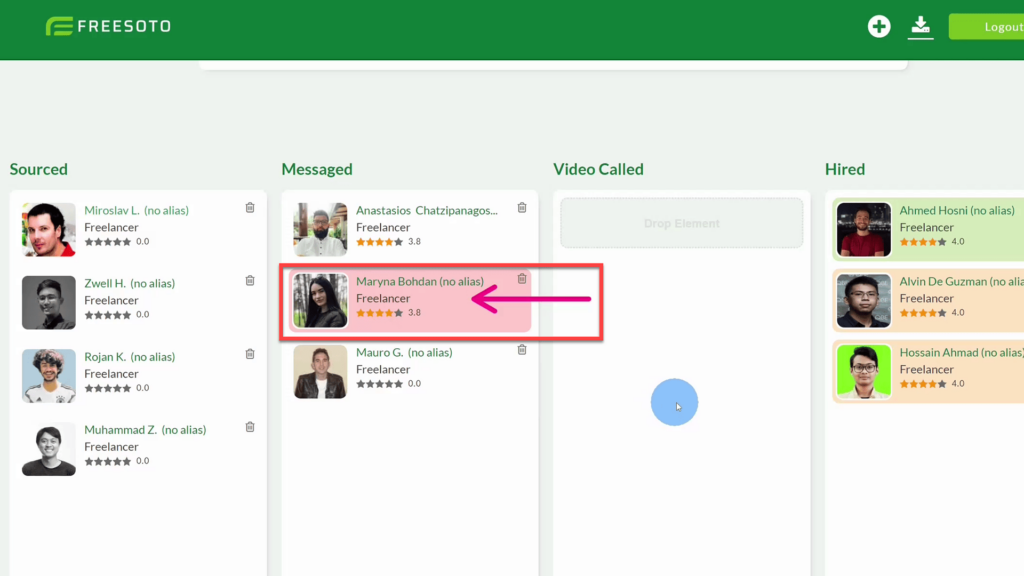
There are two kinds of independent rating systems in Freesoto. One is a quick subjective color rating. Each freelancer can be assigned a color—green, yellow or red—representing like, indifferent, and dislike. Think of it as a quick reference if you want to work with this freelancer again.
The other rating system is the star rating, which is much more intricate and allows for a much more detailed evaluation of the freelancer. The color rating is subjective, whereas the stars are objective ratings based on hard facts.
Thus, a freelancer could have a good star rating, but because of personal feelings, I still don’t want to work with them.
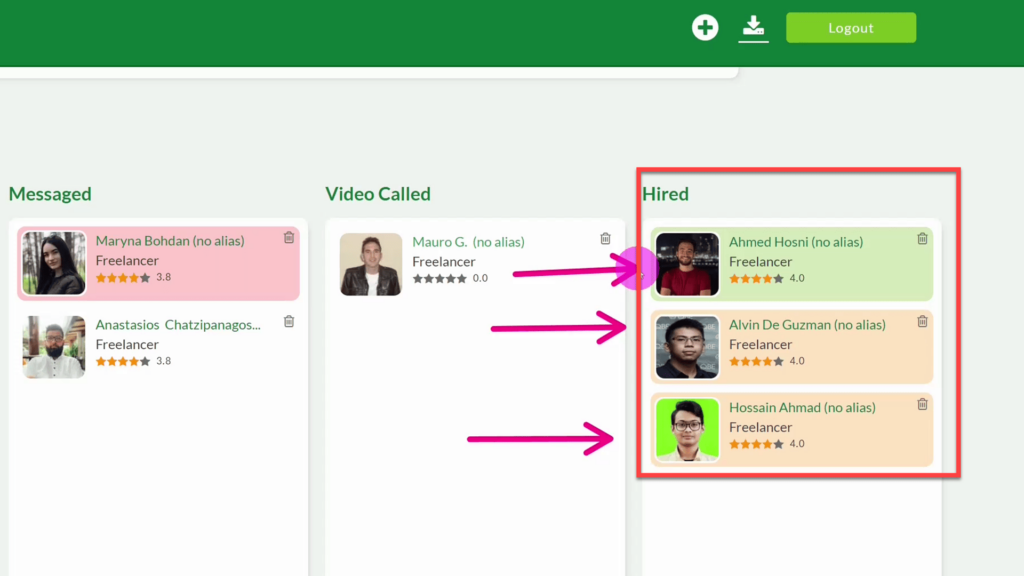
These three freelancers have journeyed through the entire funnel. I have messaged and video called each of them, and they all worked on the project. Their performance was almost equally good, which can be seen by their equal star rating. However, I would still prefer to work with the green-marked freelancer in the future because, personally, I thought they were the best fit.
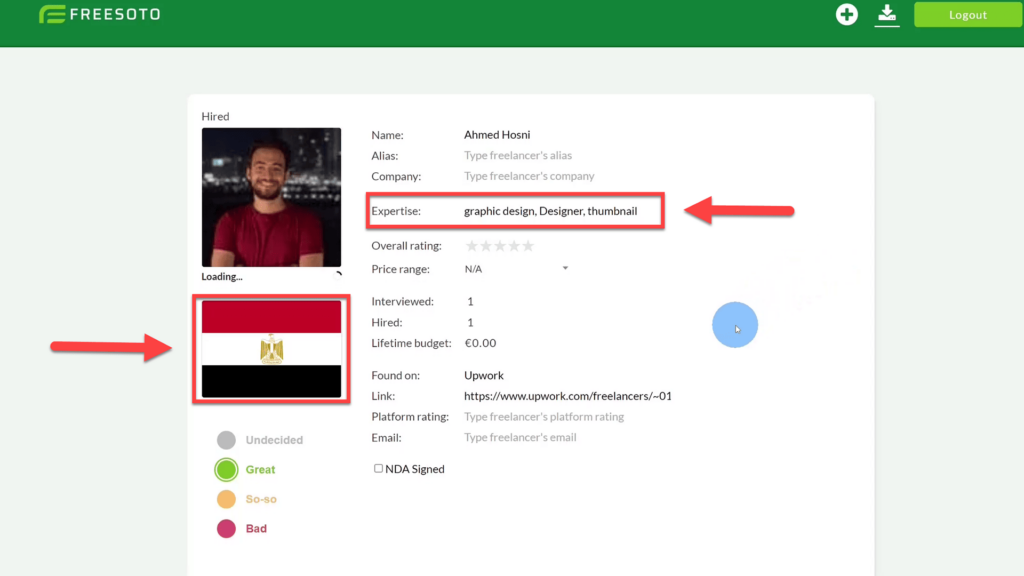
The Freelancer Detail Page opens if you click on one of the individual freelancer cards. It lets you set many things, including the country of origin and freelancer expertise. Also, the freelancer colors can be set here.
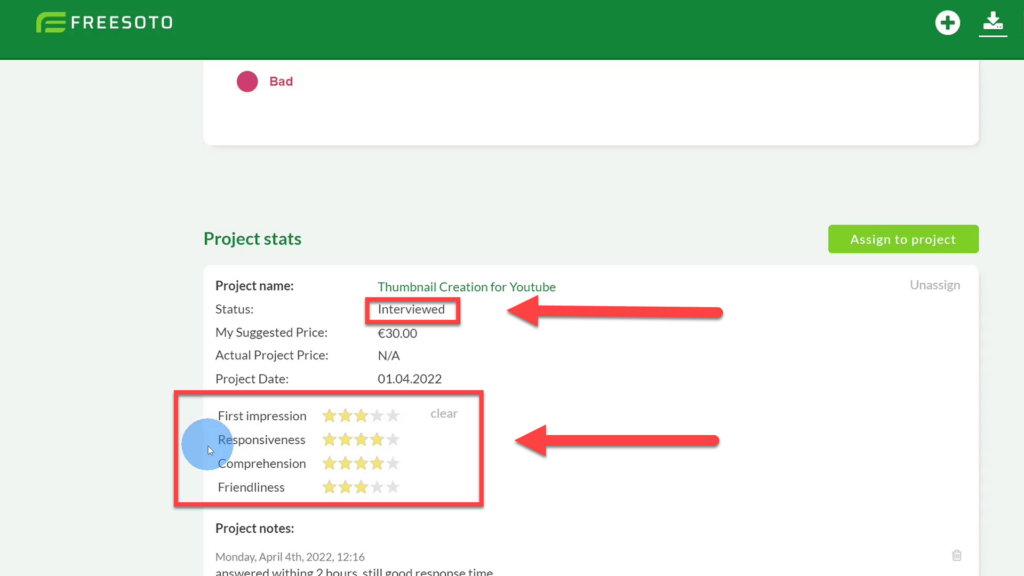
In the project stats, you can switch between “interviewed” mode and “hired” mode. During the interview phase, you can rate the freelancer by “First impression”, “Responsiveness comprehension”, and “Friendliness”.
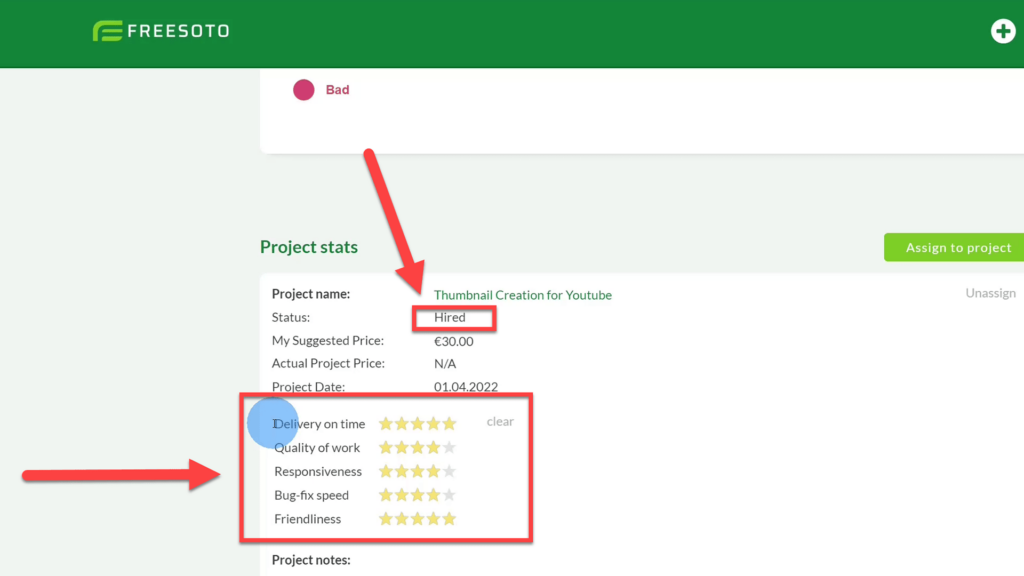
You can switch the status of the freelancer from “interviewed” to “hired”. This will allow you to rate on “Delivery time”, “Quality of work”, “Responsiveness”, “Bug Fix Speed”, and “Friendliness”.
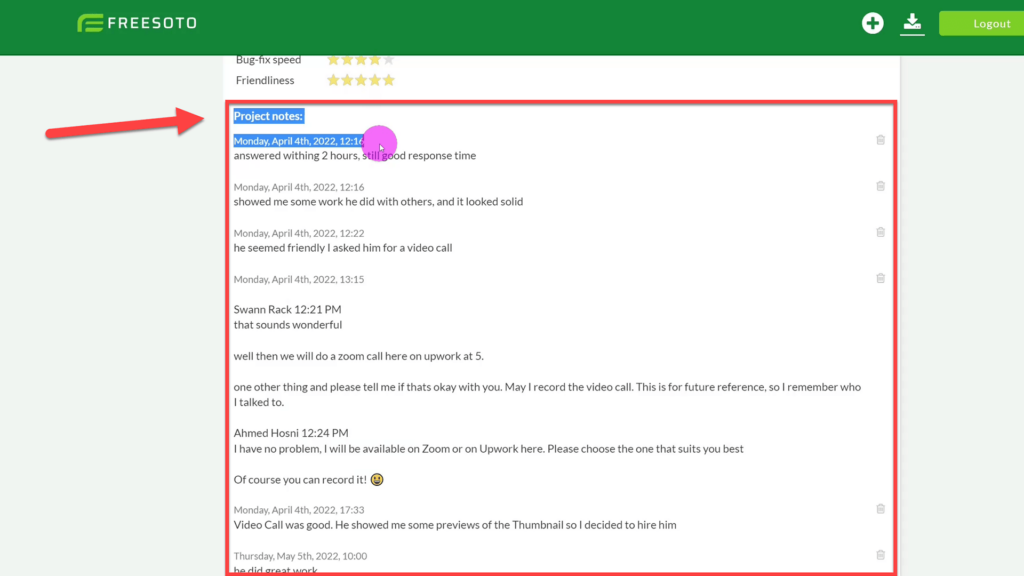
The project notes allow you to write whatever you want about the freelancer. You could also copy-paste the entire chat you had with the freelancer here. It also helps to remember what has happened in the past. Let’s say you revisit this freelancer’s page a year from now. The notes will tell you all you need to remember about the project.
For example, if you need more designers a year from now, you can come back to Freesoto, read all the notes, and hire the next person. This makes it much easier, and not all your vetting work is lost.
How to actually hire on Upwork?
Once you have completed all the vetting work and found your favourite freelancer, you can hire them.
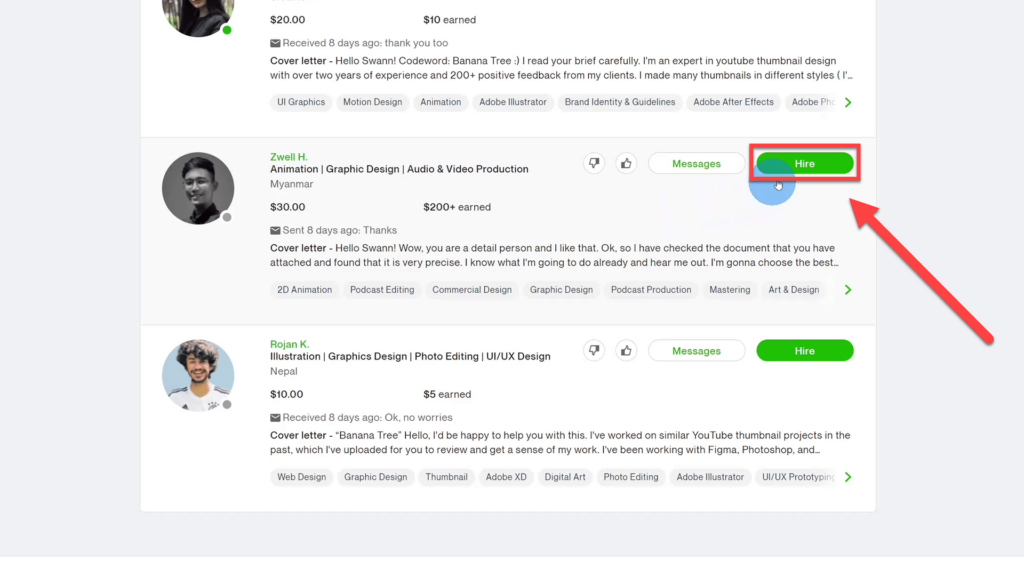
If you want to hire a freelancer on Upwork, you click on the “Hire” button, which will direct you to an overview page of the conditions. You are not actually directly hiring the freelancer; instead, you are making an offer that they will accept or decline.
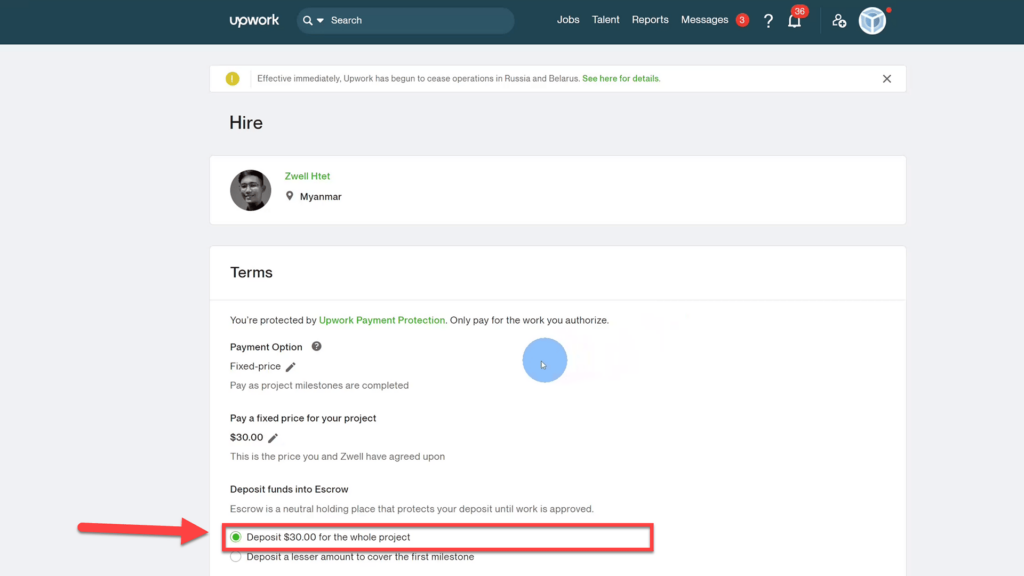
On Upwork, you are not paying the freelancer immediately. Instead, the funds go into an Upwork escrow account and are only released at the end of the project. You have two choices. You can immediately fund the entire project price or
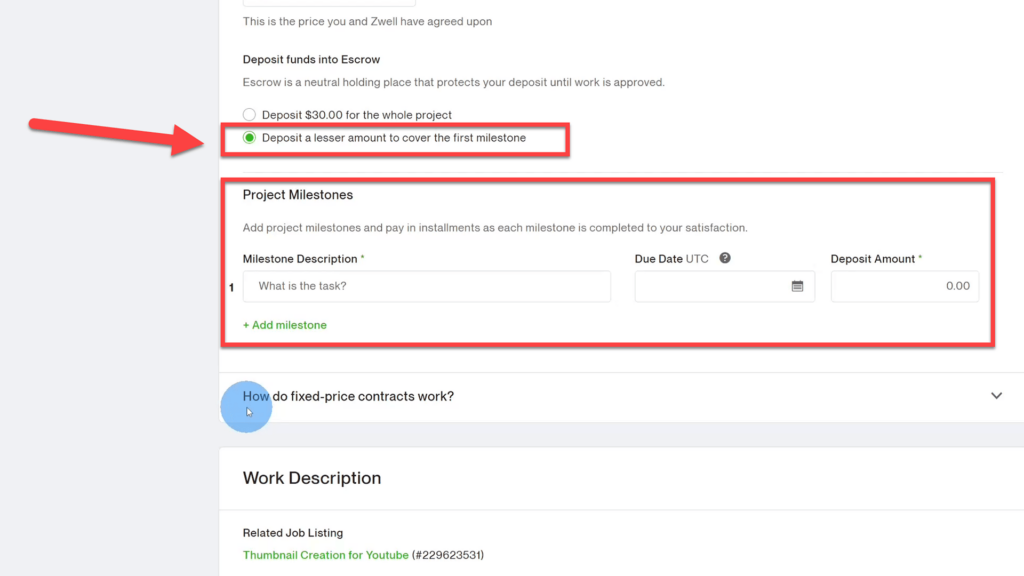
pay in installments, a.k.a. milestones, and release fractional payments over the entire duration of the project. With my small 30 USD project, it makes no sense to set milestones. However, with larger projects priced at 100 USD or more, I would recommend working with milestones.
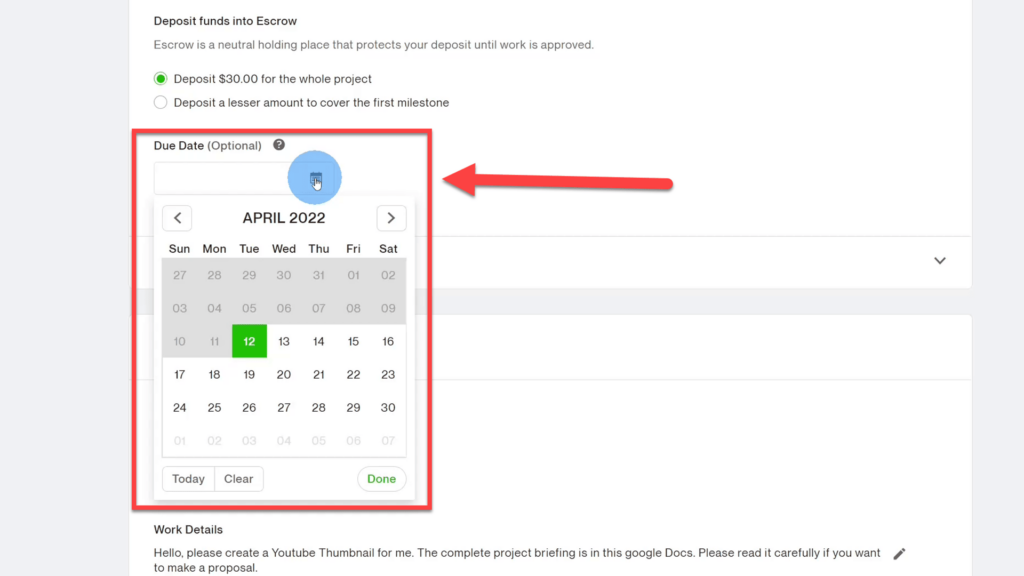
Setting a due date, a.k.a. deadline, for your project is very important. Otherwise, freelancers may take forever to deliver. Actually, it’s so important that I define the deadline three times. First, I tell them during our chat messages. Second, I specify it in the above window.
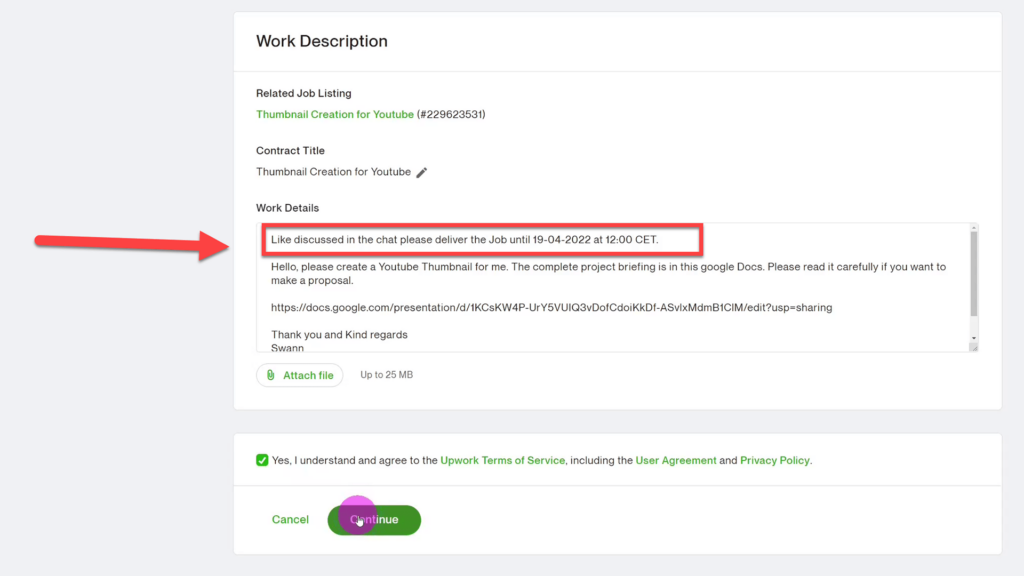
Third, I repeat the due date in the project description. You want to make it crystal clear to the freelancer that on-time delivery is absolutely paramount to the project. You can cancel projects if the freelancer doesn’t deliver on time. If you have specified the delivery date so clearly, the Upwork team will be on your side should the freelancer refuse a refund.
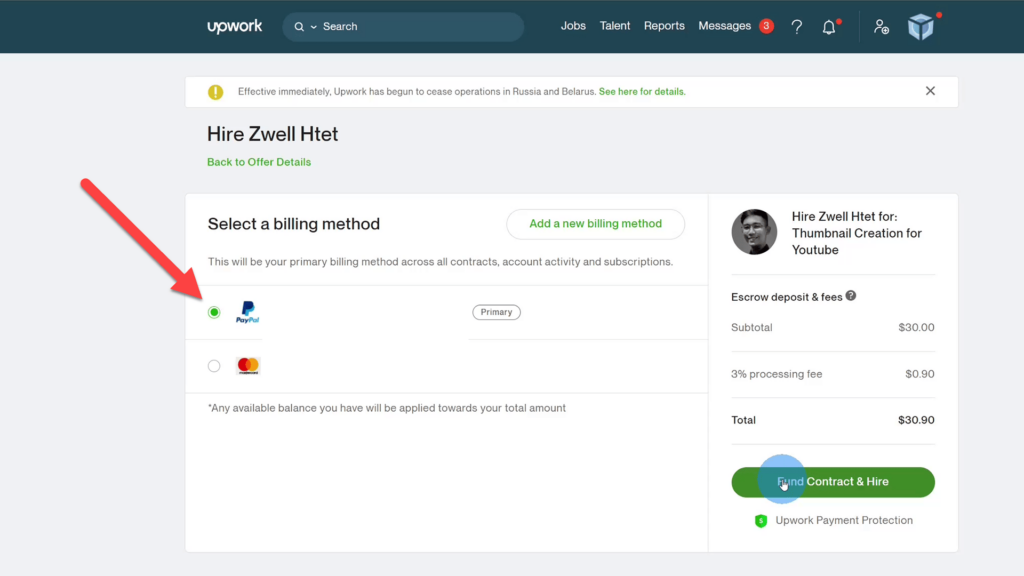
On the next page, you can choose your billing method—Paypal or credit card.
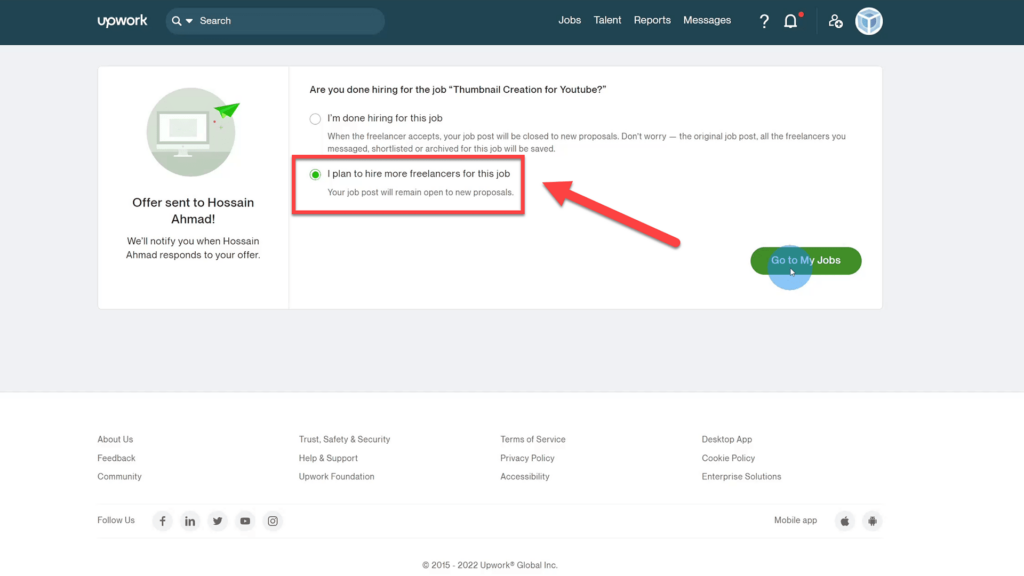
As I have stated before, you want to hire more than one freelancer for a job. I like to let three people work on the same project. That way, I can compare their work to find the best freelancer for future projects.
How to review freelancers on Upwork?
Rating freelancers is an important part of the Upwork experience. It especially helps future clients to understand how well the freelancer is working.
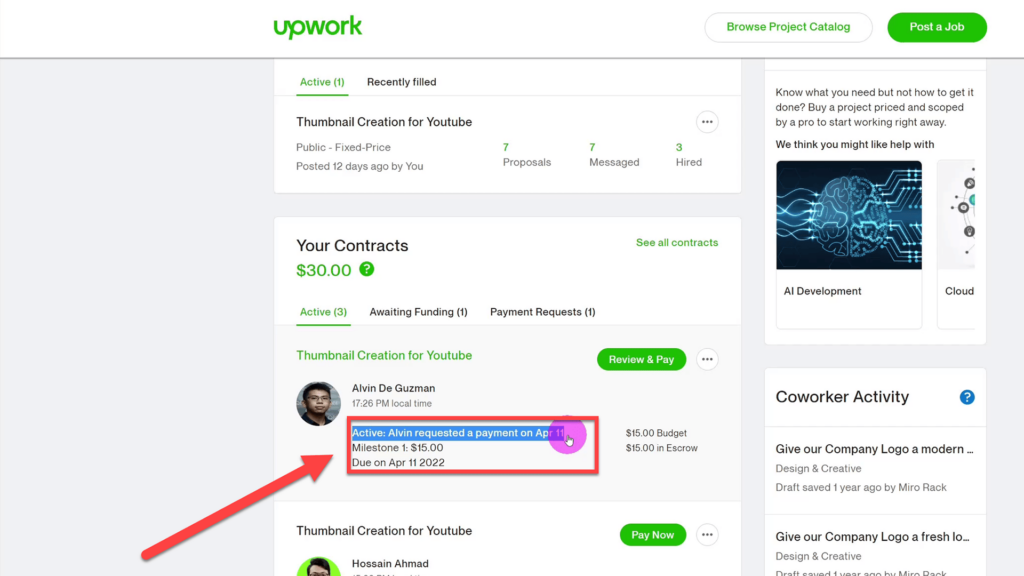
Once a freelancer has completed the project or a milestone, they will request payment. Another way to say this is that you are asked to release the funds you deposited from the Upwork escrow account.
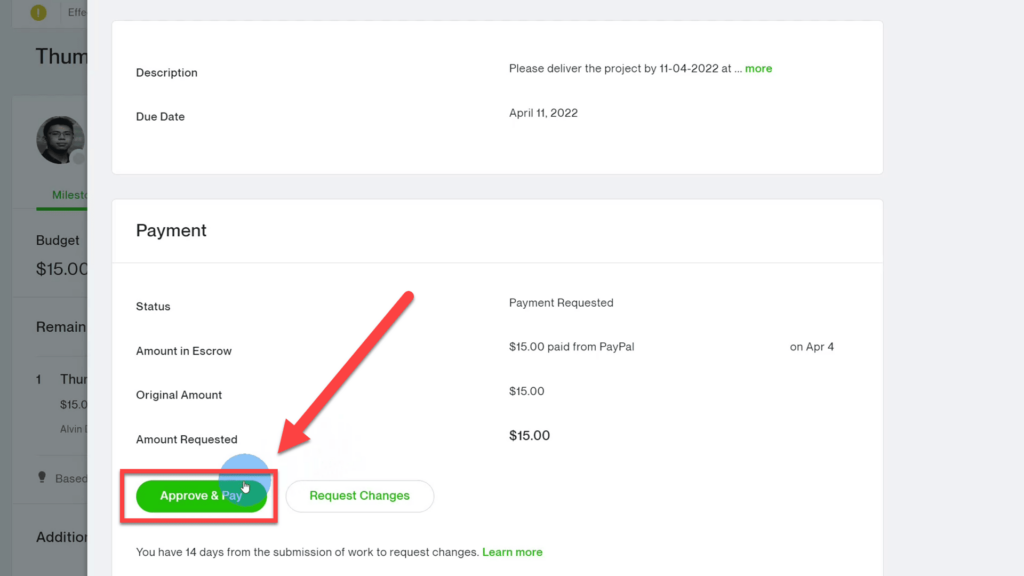
You will be prompted with an overview of the total payment the freelancer has requested. Check everything and pay. Understand that if you release the payment, a refund is not possible.
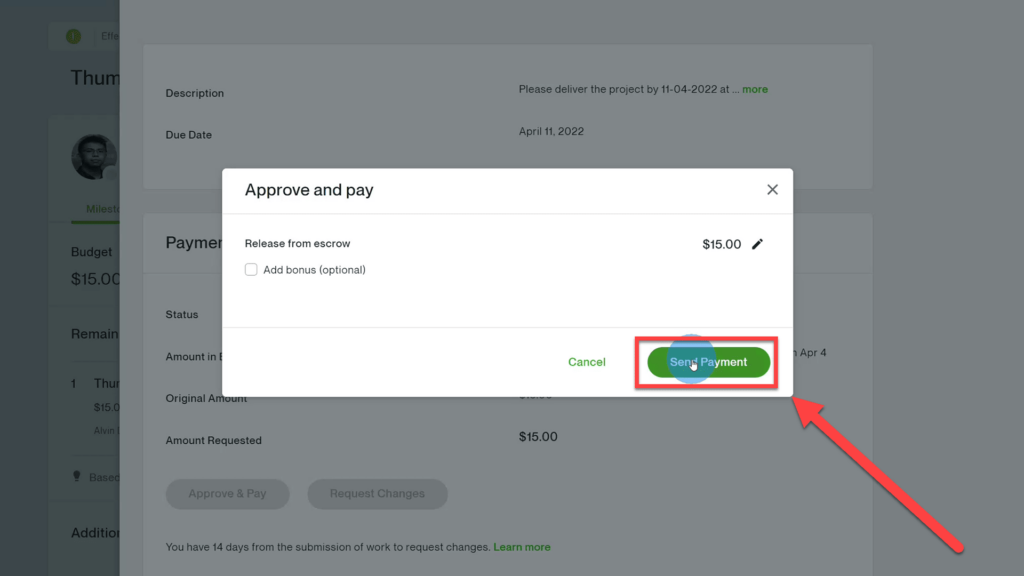
You can also add a bonus payment if the freelancer did an exceptional job, but that is voluntary.
In this case, there was only one project milestone. If there would have been more, Upwork would now ask you to fund the next milestone.
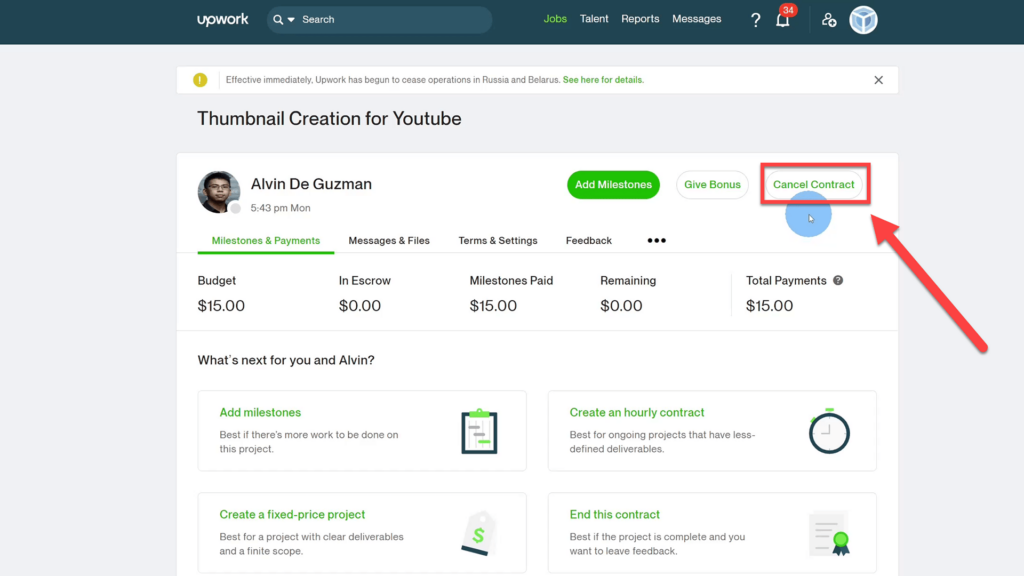
Rating the freelancer only is only possible after canceling the contract. I find this wording a little confusing because it sounds like the project didn’t go well, and you want to void the contract—but that’s the way it’s worded.
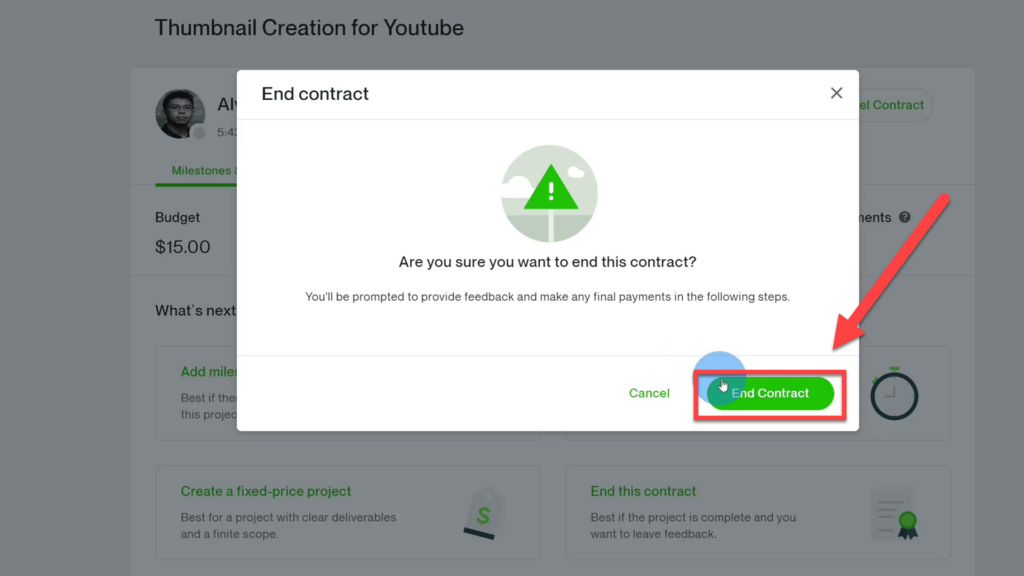
After canceling the contract, you will be prompted by another window to confirm that you want to end the contract. This will finally end the contract.
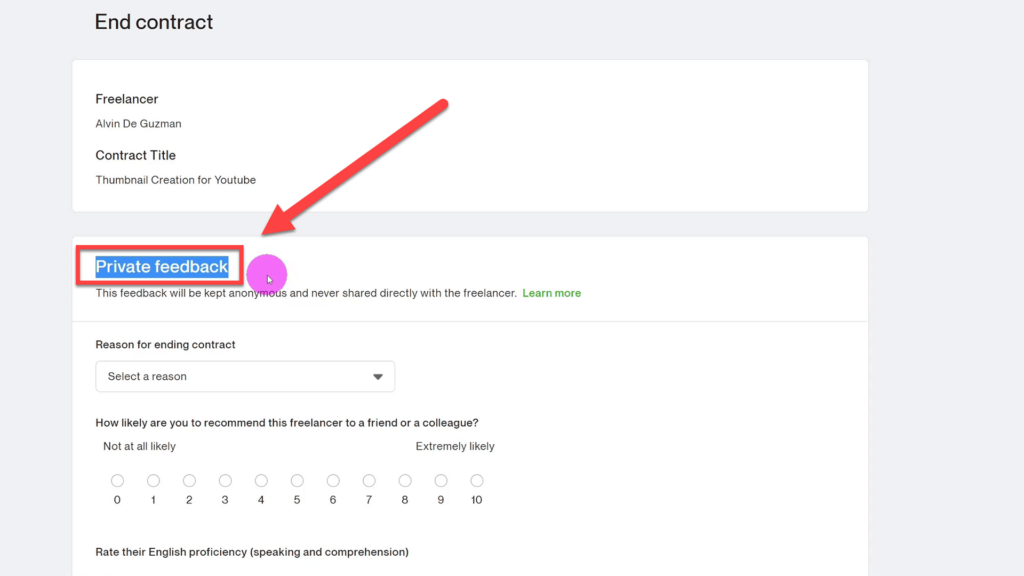
On Upwork, there are two kinds of feedback—private and public. First, you are asked to leave private feedback, which will not be shared with the freelancer or the community. I personally don’t really understand the private feedback if no one can see it.
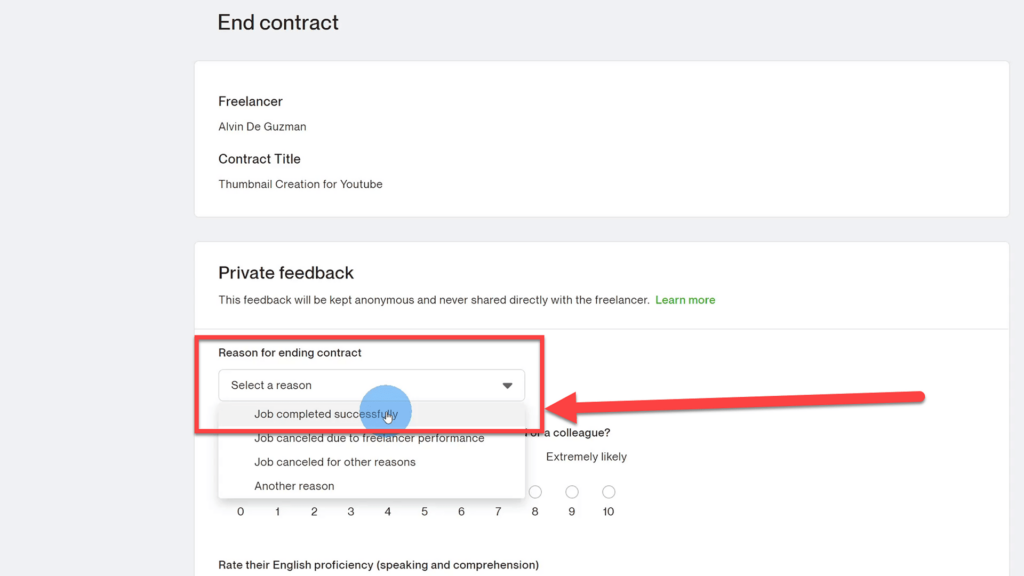
You are asked to select the reason for ending the contract. Hopefully, it was because the job was completed successfully.
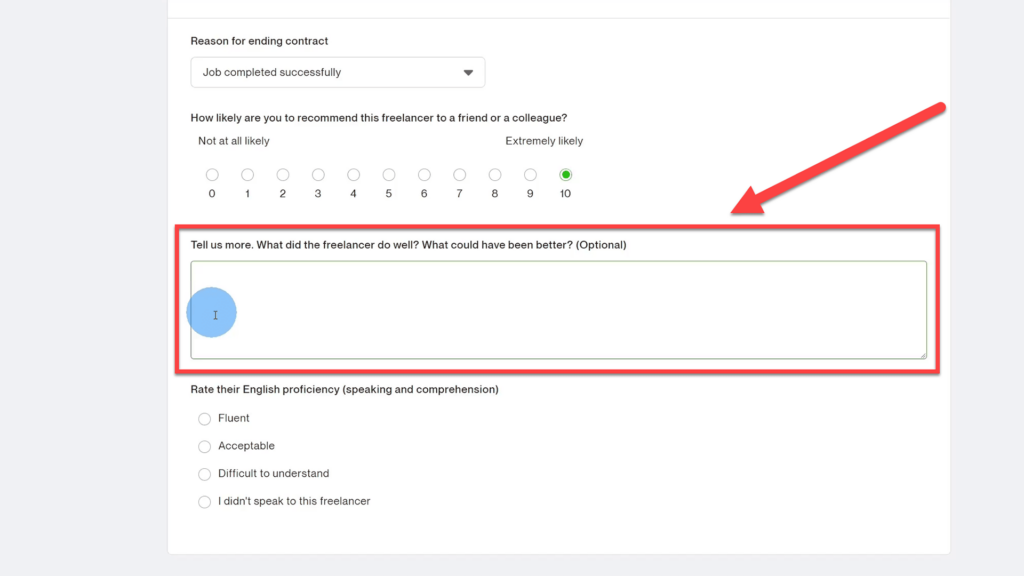
I suppose Upwork uses this private feedback to train their internal algorithms. Because of this, I don’t really care about the private feedback and try to skip it as often as possible.
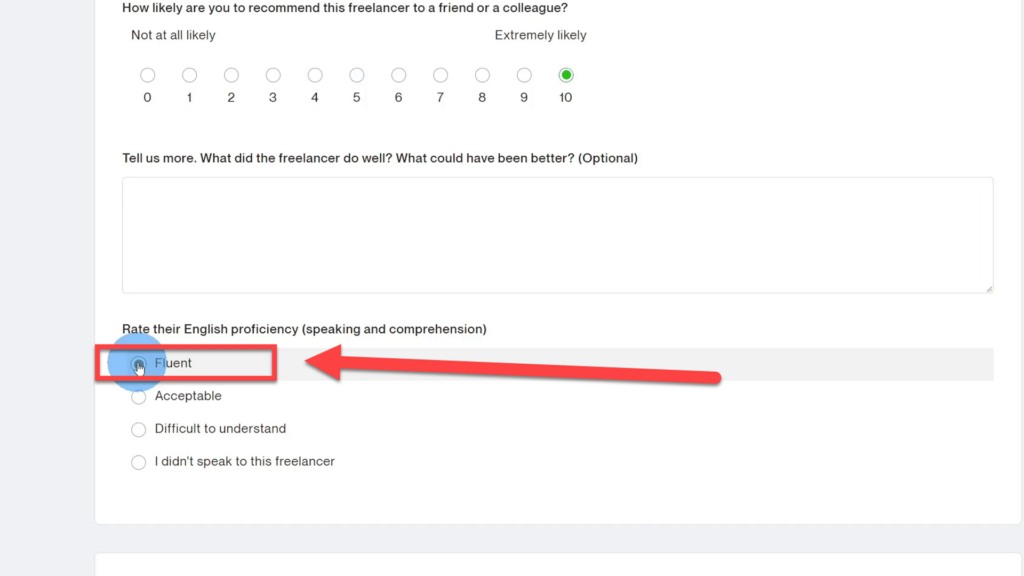
English proficiency is one of the private feedback questions which can’t be skipped. I find this redundant because, as I stated before, you shouldn’t work with a freelancer who can’t communicate well in English anyhow.
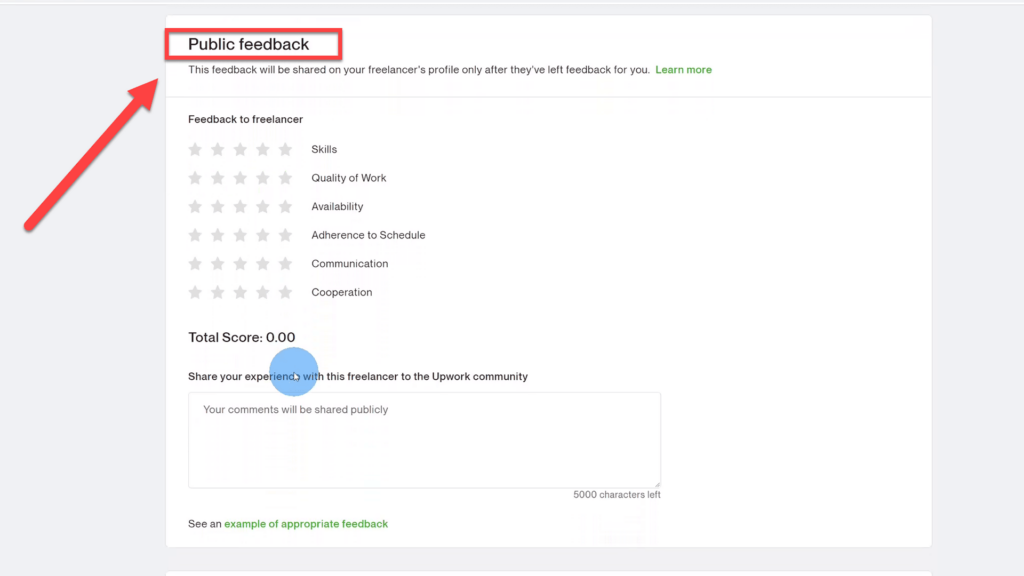
Public feedback will be shared with the Upwork community. Future clients will be able to see the freelancer’s ratings and read their reviews to make a decision if they want to hire them.
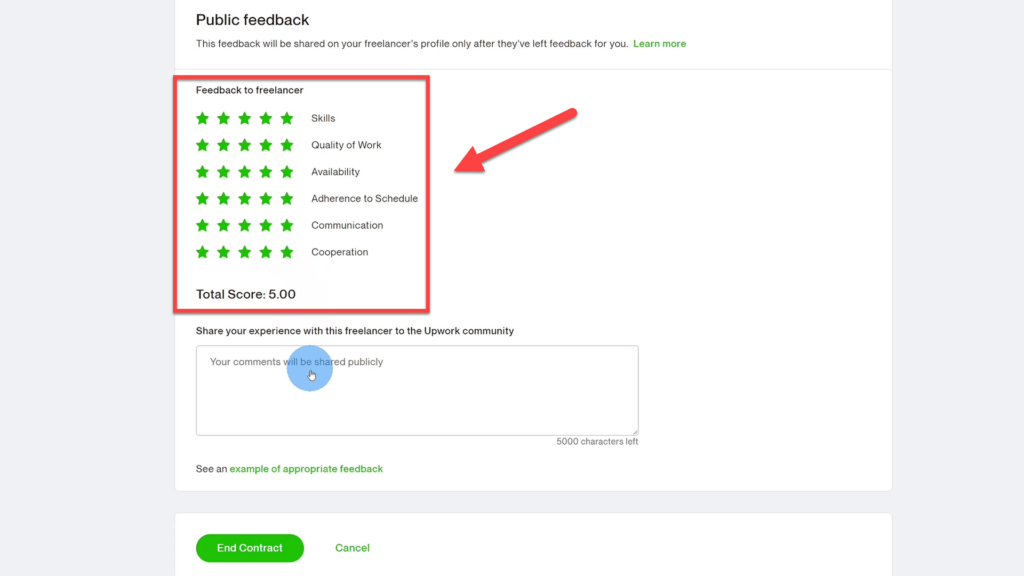
The stars allow you to rate the freelancers in multiple categories. All categories are weighted the same and result in a total maximum score of five. Rating a freelancer can get you into a moral dilemma. Of course, you want to be honest, to also allow other clients to make a good decision about whether to hire this freelancer. However, you also need to understand that rating the freelancer badly will hurt their future job prospects on Upwork, and that’s also not desired.
Here is how I rate freelancers:
- If a job deliverable(s) was fantastic and I was blown away by the quality, I give them five stars, and I write a long and very nice review.
- If the job was completed “good”, I give them five stars and write something short like. “Good job, Thanks.”
- If I think that the job deliverable(s) was “not great”, I tend to give four stars and leave no feedback.
- Only if the job deliverable(s) was horrible and I didn’t get my money back from the freelancer would I will give a bad rating with a long explanation why.
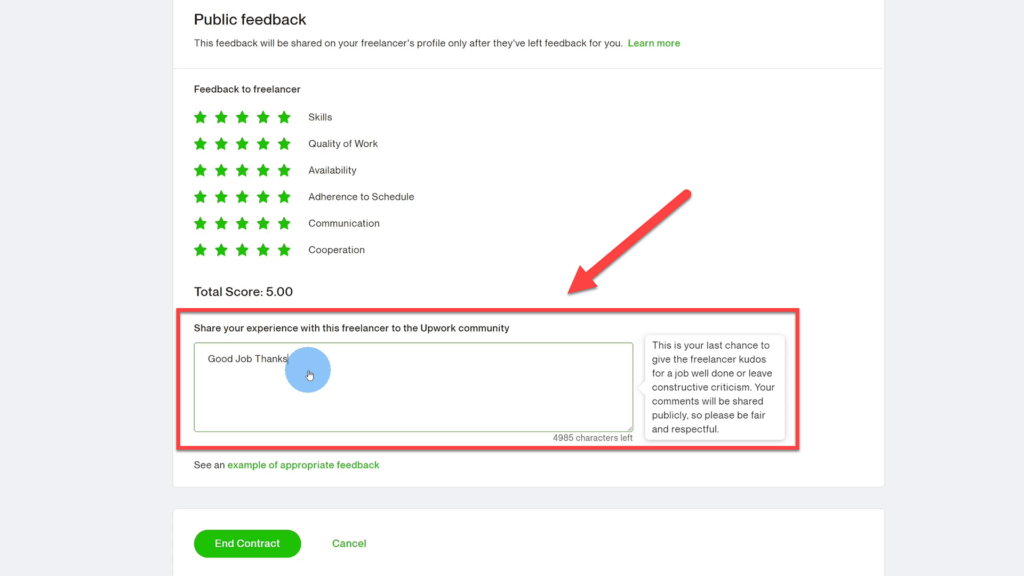
A combination of your public star rating and text will be displayed for other clients to review in the freelancer’s profile. This helps other clients evaluate the freelancer before they hire them.
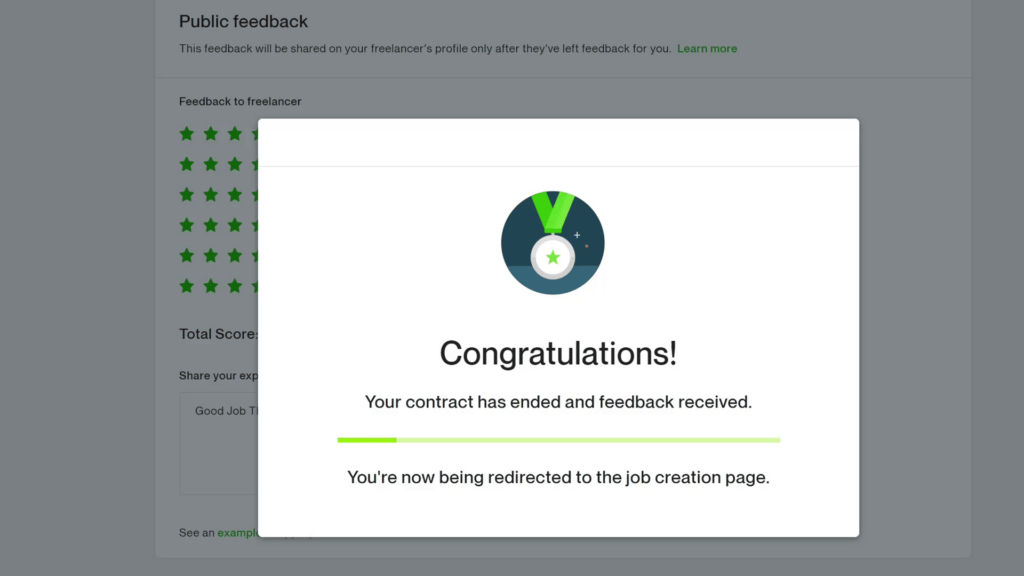
After you have given the public and private feedback, the Upwork process is complete. You are now ready to create another project if you like.
